I’m a big believer in multi-factor authentication for NetScaler Gateway deployments. I’ve posted several guides and spoken at events in the past on the importance of having 2FA or MFA solutions in place for an enterprise. One that I had used years ago was SMS PASSCODE. They were bought by CensorNet earlier this year so I decided to try out the latest version with with my NetScaler and see what’s changed. The big thing I want to point out that as of last month, SMS PASSCODE is being re-branded as “CensorNet MFA” so you’ll see the name gradually change over the next few months.
Last year I talked about “How to deploy Microsoft Azure MFA & AD Connect with Citrix NetScaler Gateway” which is a half cloud/half on premises solution so really, a hybrid approach to multi-factor authentication. What if your company needs and on-premises solution or isn’t an Azure customer willing to pay for the Premium level Azure AD subscriptions or the Enterprise Mobility Suite (EMS)? And what if you had a need for Adaptive MFA that go beyond the basic conditional access Azure MFA can currently provide? SMS PASSCODE is a solution that is able to handle both of these use cases very well in my opinion.
To explain Adaptive Multi-factor authentication if you are not familiar with it, it is something a lot of multi-factor and identity and access management vendors are now pushing. What this allows is the ability to trust certain devices/locations/other scenarios while not others. This means the user can get pass-through authentication or be challenged by MFA depending on these environmental factors you define and the level of trust you have for that particular session. Hence, a type of multi-factor authentication that adapts to the scenario.
I’m going to show you a very basic install and configuration of SMS PASSCODE with your NetScaler Gateway.
Installing SMS PASSCODE Server
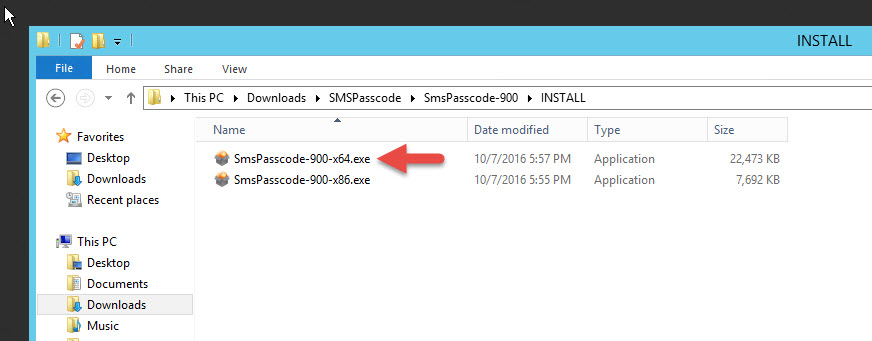
1. Stand up a new domain joined Windows server and install SMS PASSCODE. You should install the Windows Network Policy Server (NPS) role first as a pre-req because the installer doesn’t do it for you. In this example, I am not installing it because I want to show you how to fix it if you forget to install this role first. I am using version 9.0 so my zip file is a tiny 40.5 MB file called “SmsPasscode-900.zip”. Just unzip it and begin the x64 install:
2. Hit Next

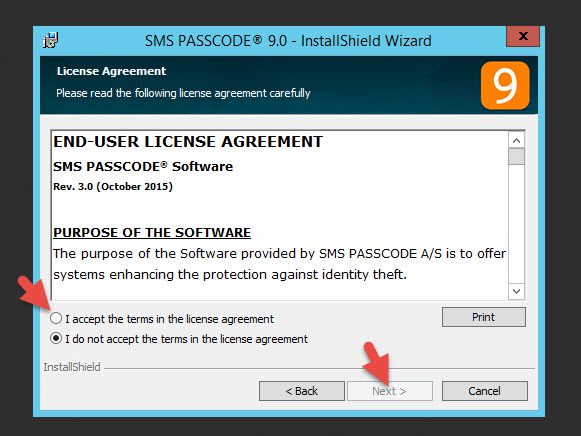
3. Accept the EULA
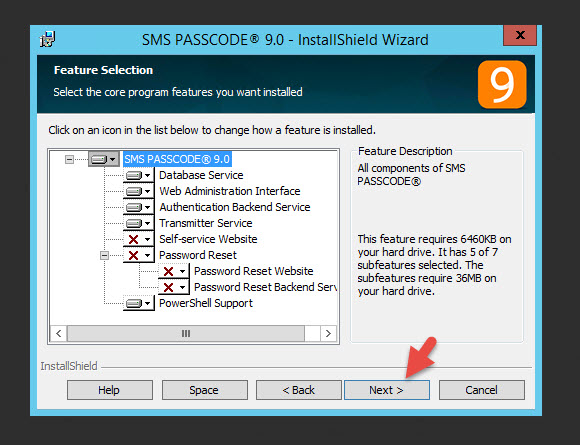
4. You can leave all the default components. Notice there is a Self-service Website and Password Reset functionality that is not being installed. This can be installed later on web servers dedicated to this functionality, the Self-service website internally and the Password Reset site in your DMZ. I also want to note some of these roles can be broken out and scaled up as needed for larger environments.
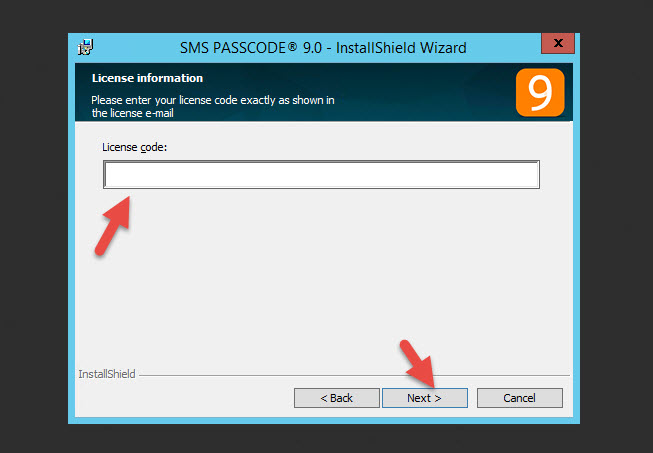
5. Now enter your license code (yes, the license code is the size of a small novel so copy and paste is your friend).
6. Choose your application install location and hit Next

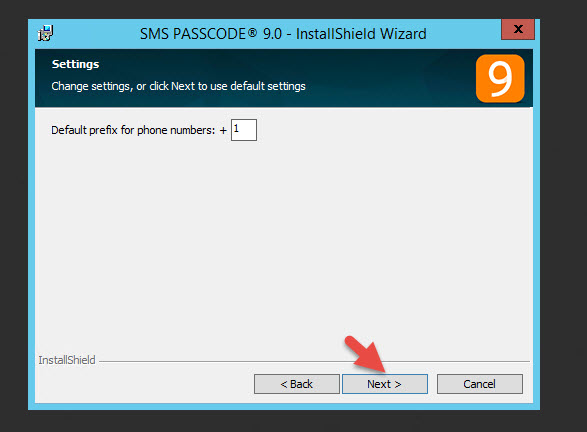
7. Since I’m in the US I will keep the default +1 prefix for phone calls
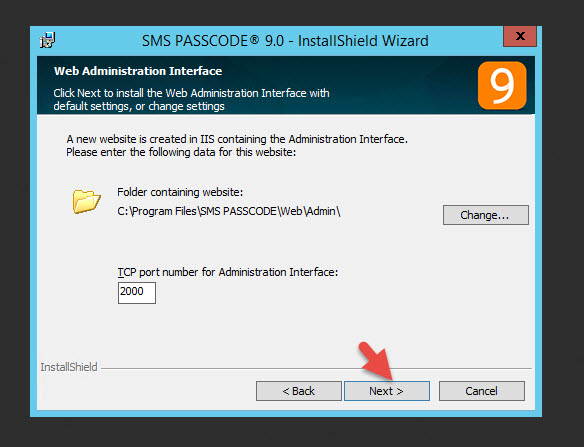
8. I’ll keep the default port 2000 for the web administration interface. Just hit Next
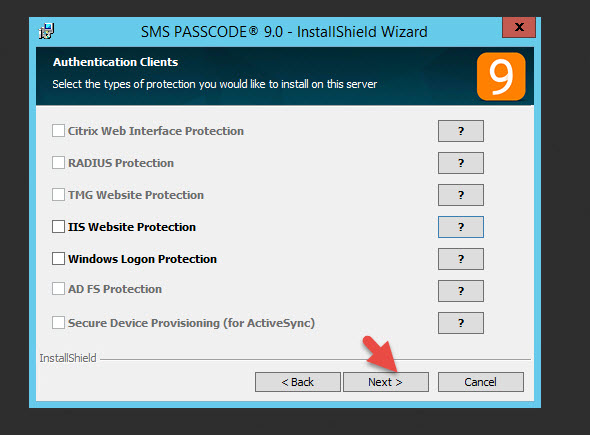
9. On this screen the installer is asking for Authentication Clients. It just means things it has detected that can be used with SMS PASSCODE. I intend to use RADIUS with my NetScaler Gateway and you can see here it is greyed out. The reason is I need to install the Windows Network Policy server role on this server before SMS PASSCODE can protect it. As I mentioned in Step 1, you should have this in place already but I am showing you how to correct if if you forgot. I will install this role after the installer is done and show you how to correct this later on in the article. If you installed NPS before beginning the installer and you can check this box, do so now. Otherwise, just hit Next.
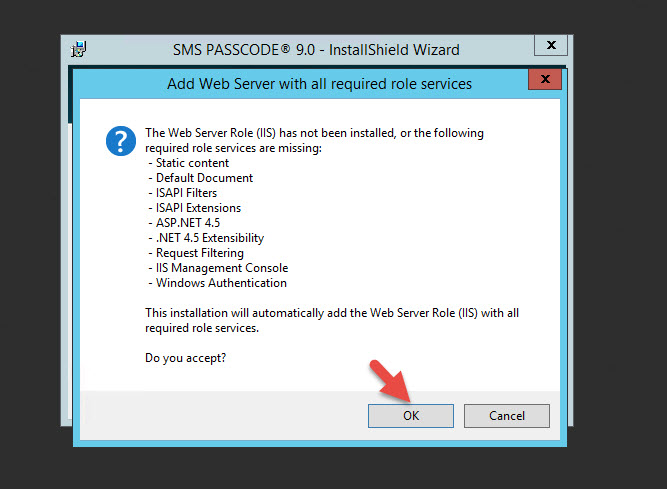
10. The installer will see IIS has not be installed yet. Just hit OK to install it.
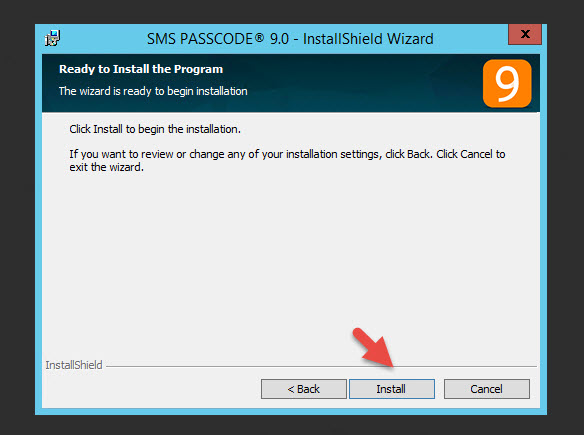
11. Click Install to begin the install
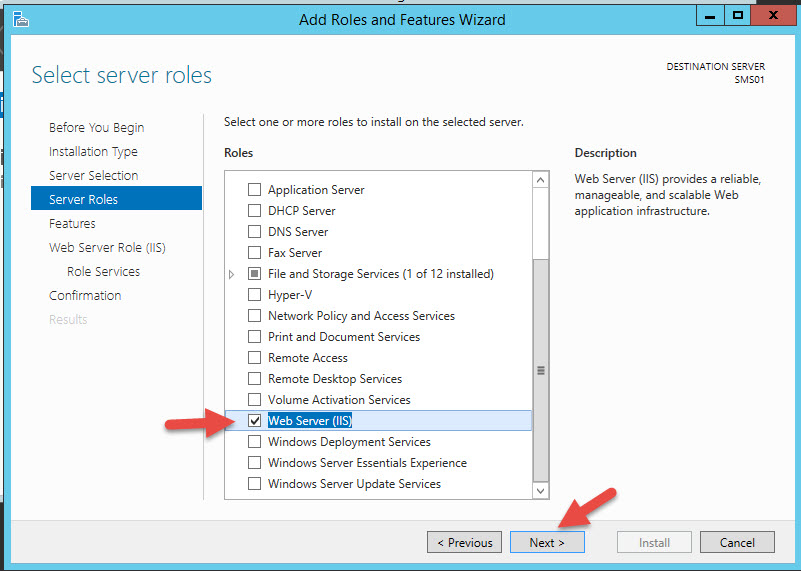
12. PowerShell should kick off and try to install the IIS role but sometimes it can fail with an Error 1722 like this.
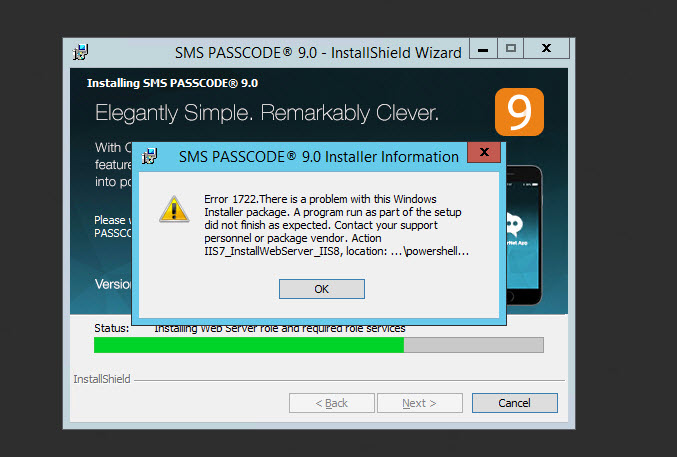
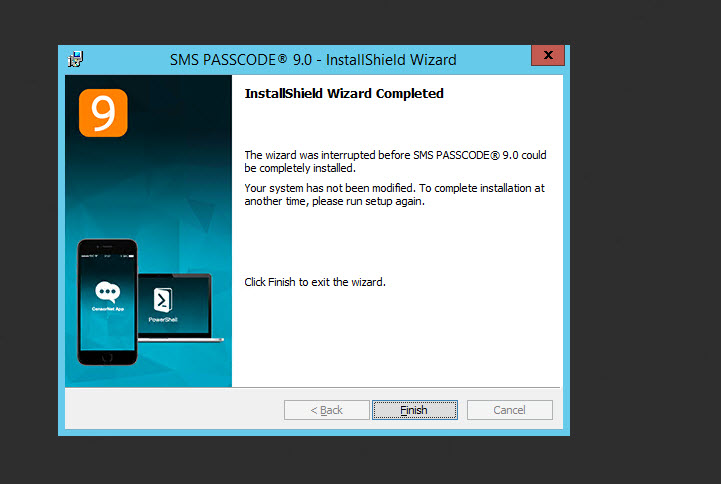
13. If this happens just install the IIS role manually through Server Manager and re-run the installer
14. When the install is nearing the end you’ll get a prompt to open the Configuration Tool. Hit OK

Configuring SMS PASSCODE
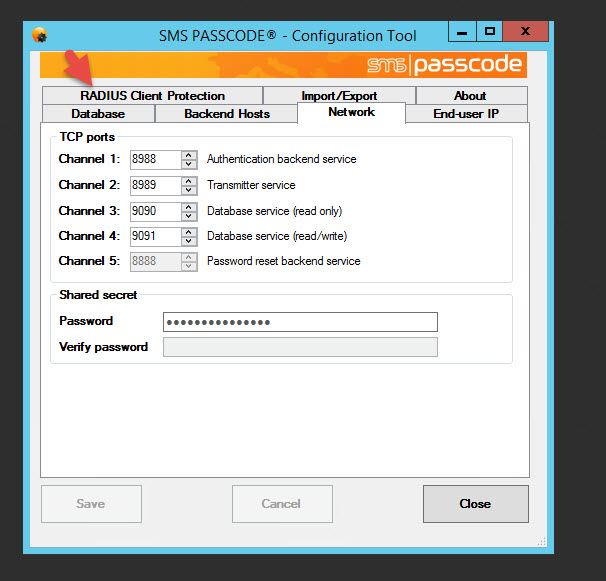
15. The Configuration Tool will open and ask you for the Network ports you want to use. You can use the defaults. I like the fact this comes up first because if the SMS PASSCODE server resides in a secure zone sandwiched by firewalls you will need to open ports and this makes it convenient letting the engineer know exactly which ports are going to be used and for what.
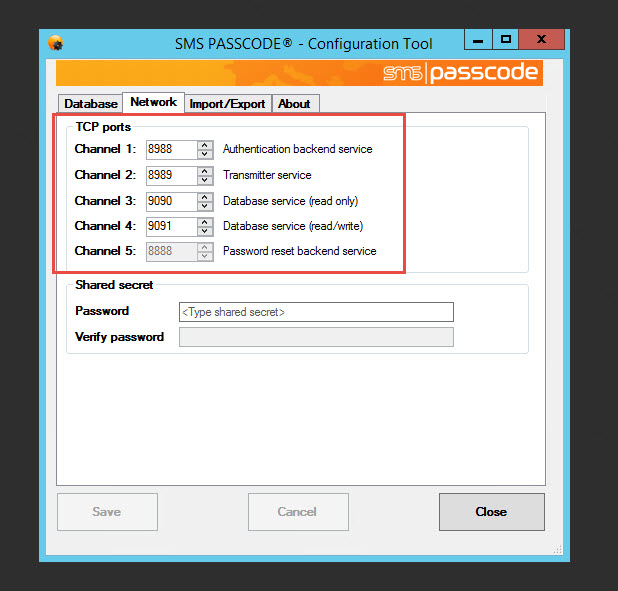
16. Below this is the box for the Shared secret. When you add more servers they need to be able to trust each other and they will use this secret. Make the password at least 15 characters long and save it away for later.

17. Make sure to save your config

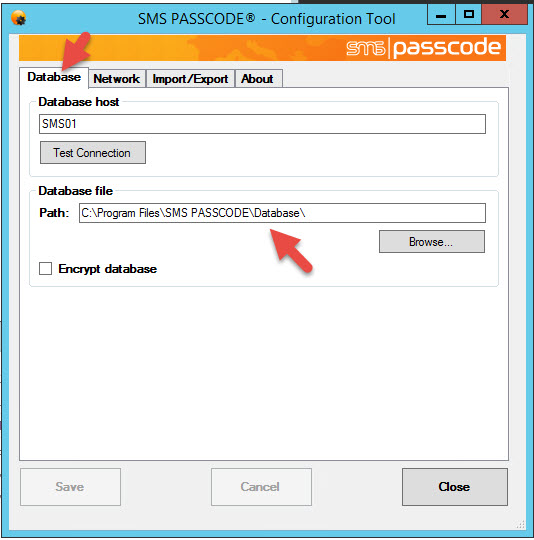
18. If you click on the Database tab you can see where the SMS PASSCODE database is being stored. If you go to that path you’ll see it’s just an XML file:
|
1 |
C:\Program Files\SMS PASSCODE\Database\SMSPASSCODE_DB.xml |
19. Once you hit close on the tool the installer will finish writing it’s config and begin starting services:
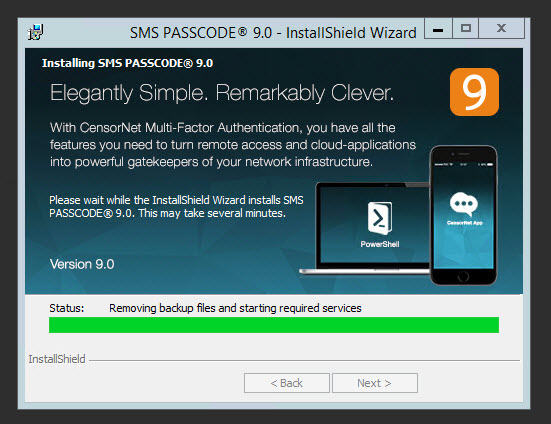
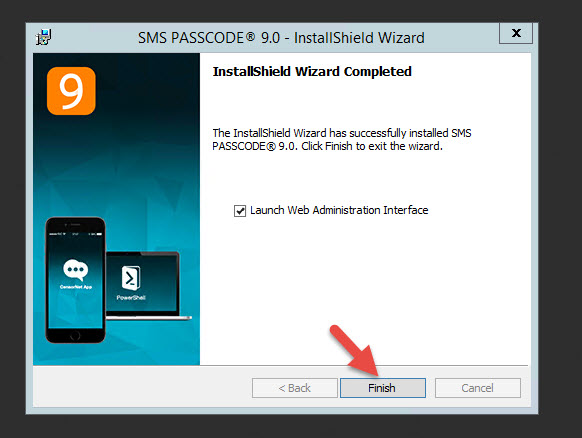
20. Hit Finish to launch the Web Administration Interface
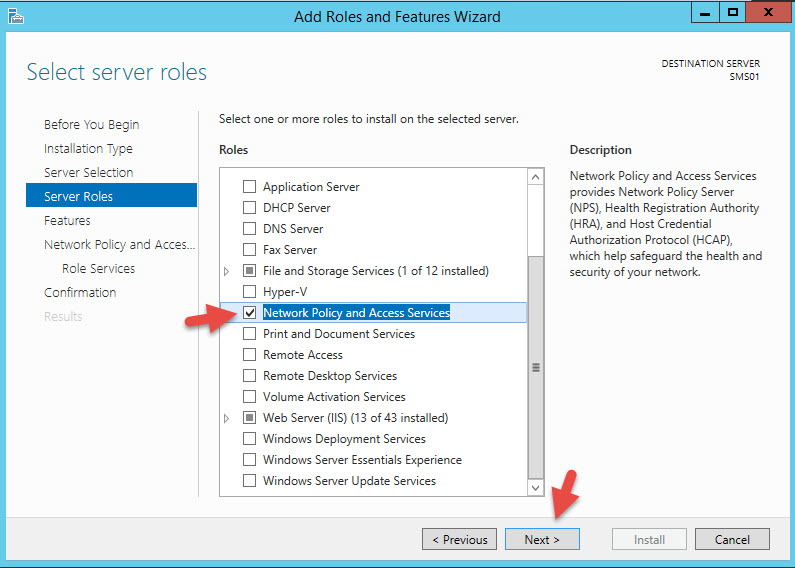
21. Now remember we still need to install the Network Policy and Access Services role.
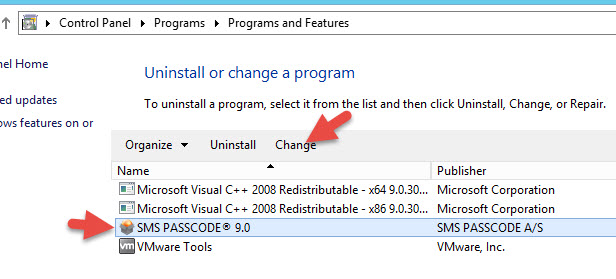
22. Once done installing NPS, go to Control Panel > Programs and Features, and Change your SMS PASSCODE install
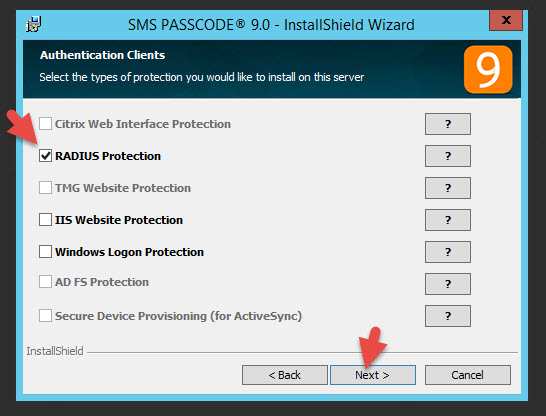
23. Hit Modify and hit Next until you get to the Authentication Checks. Now RADIUS Protection will be available to you so check it. Would have been a whole lost easier if the installer did a pre-req check and had installed this role, right? 🙂
24. Now open up the Configuration Tool and you’ll see RADIUS and a few extra tabs
25. Click on the Radius Client Protection tab and hit Edit default settings

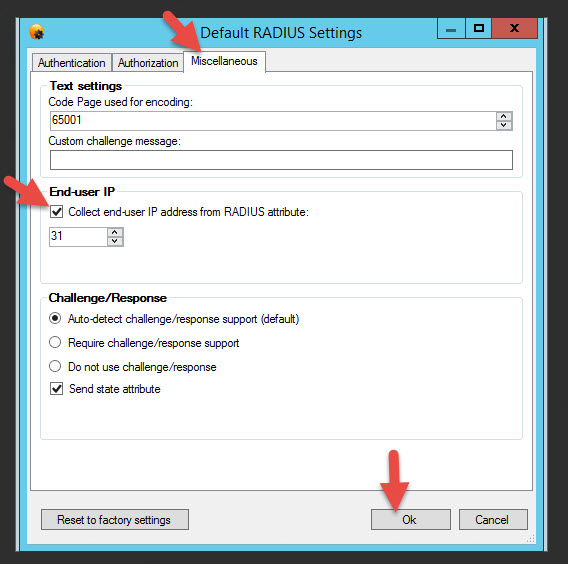
26. Go to the Miscellaneous tab and check “Collect end-user IP addresses from RADIUS attribute” under End-User IP. Once you hit Ok make sure to hit Save to save your config which will also restart the NPS Service.
Importing AD users into SMS PASSCODE using the web interface
27. In the the Web Administration interface go to Settings > General > Misc. Settings tab. Under “User store integration” click Enabled (multi sync mode) which enables AD integration. Also check Geo IP and IP history as well as Secondary phone numbers. These can come in handy later for logging purposes and to handle users with multiple phones. Don’t forget to hit Save in the top right.
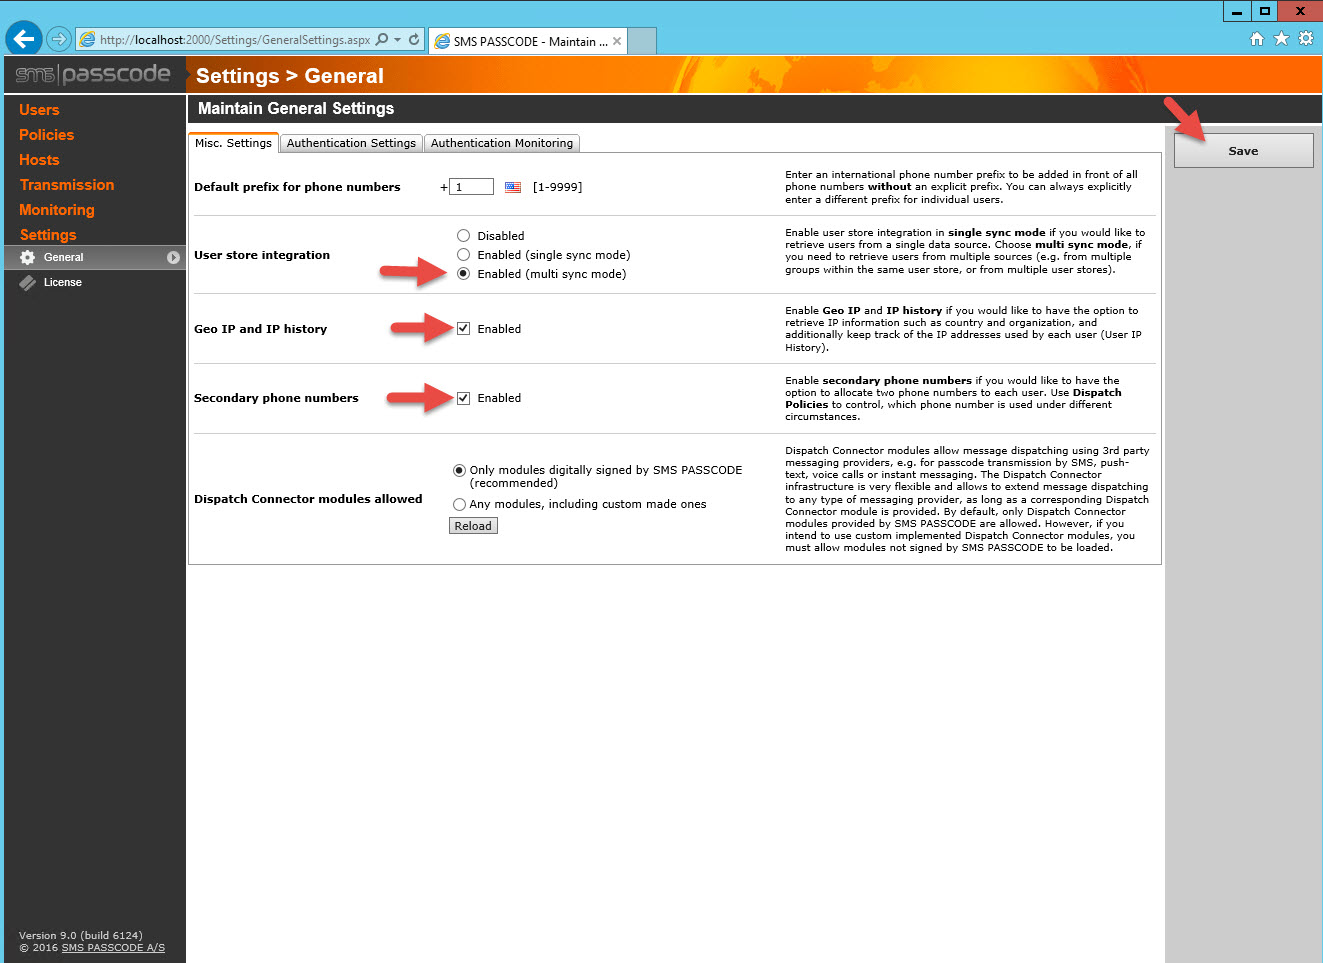
By the way, Geo location has it’s own map within the SMS PASSCODE web console but this data can also be pushed to Splunk for additional analytics (one of my favorite search and visualization tools to use with my NetScalers – https://splunkbase.splunk.com/app/1702/).
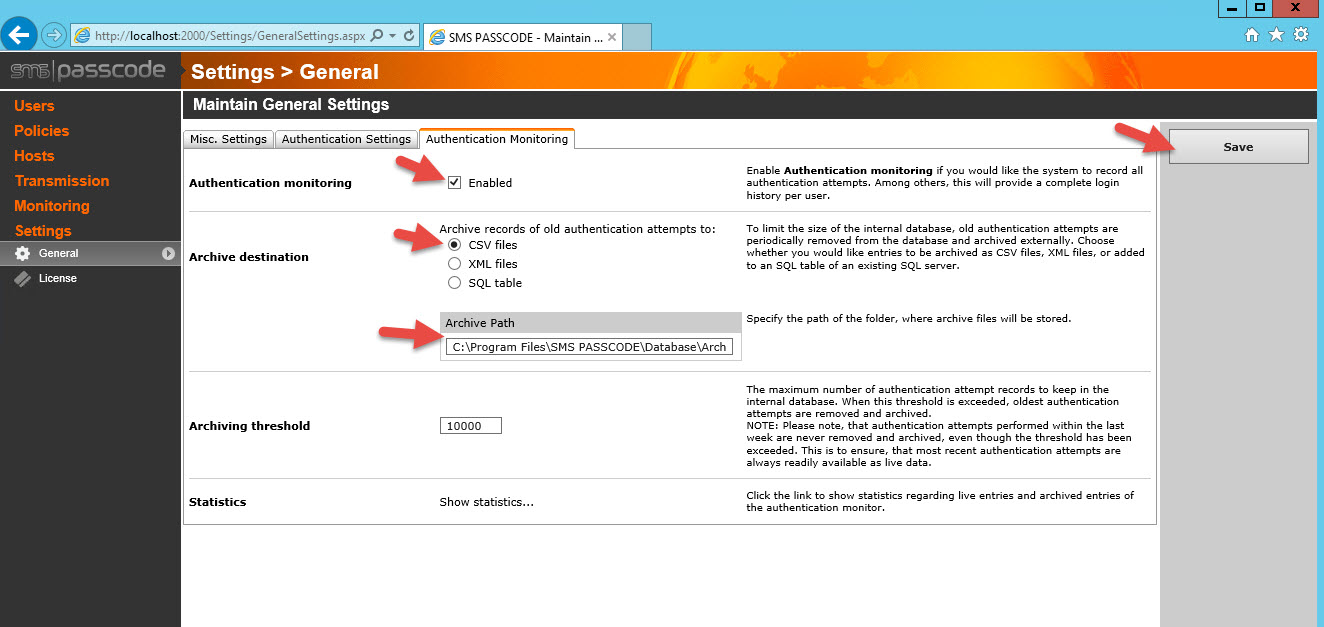
28. Go to the Authentication Monitoring tab and enable logging. This will help with AAA logging retention requirements. You can leave it as the default CSV method if you like. I don’t recommend leaving logs on the C: drive as they can fill up the system drive. I recommend having a separate drive attached to the VM for logging purposes and these logs should be grabbed by a SIEM other log parsing utility. Right now there is no mechanism to syslog natively from within SMS PASSCODE but it would be a nice feature if they add it in the future. It writes to Windows event logs so you can always forward from there if necessary. Don’t forget to hit Save in the top right.
29. Now go to Policies > User Integration Policies on the left side. You might see the Default User Integration Policy is attempting to sync but failing which is fine.
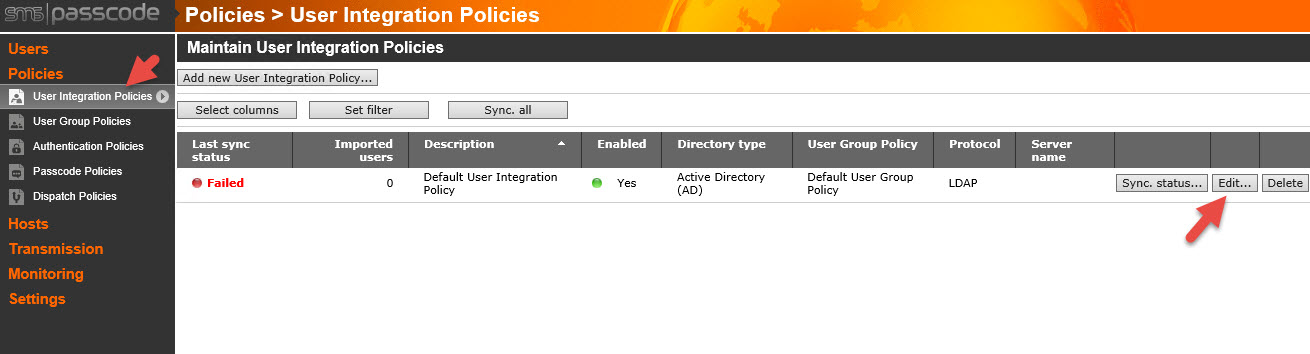
Click Edit and go to the Data Source tab. So you can see here the security group name it is looking for to sync users up with in AD is called “SMS PASSCODE Users”. If you don’t have an AD group yet you need to create one named this and add your users. If you are intending to use an existing security group then you must put the security group name here and hit Save.

Keep in mind every one of your users must have the mobile attribute populated with their cell phone number or they won’t be synched into SMS PASSCODE.
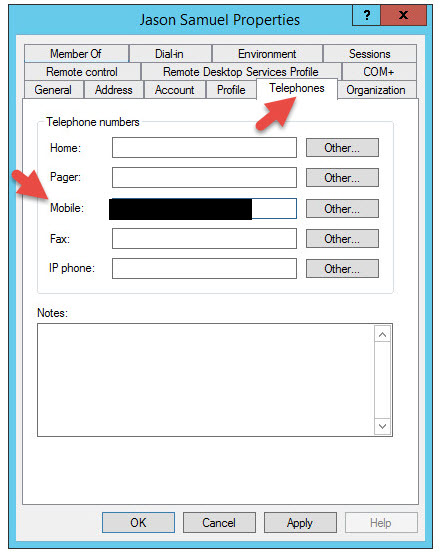
You can change this behavior by changing the attribute mapping under the Data Mapping tab or stopping the mobile number check under Data Filtering though I do not recommend doing this unless you have a real need to.
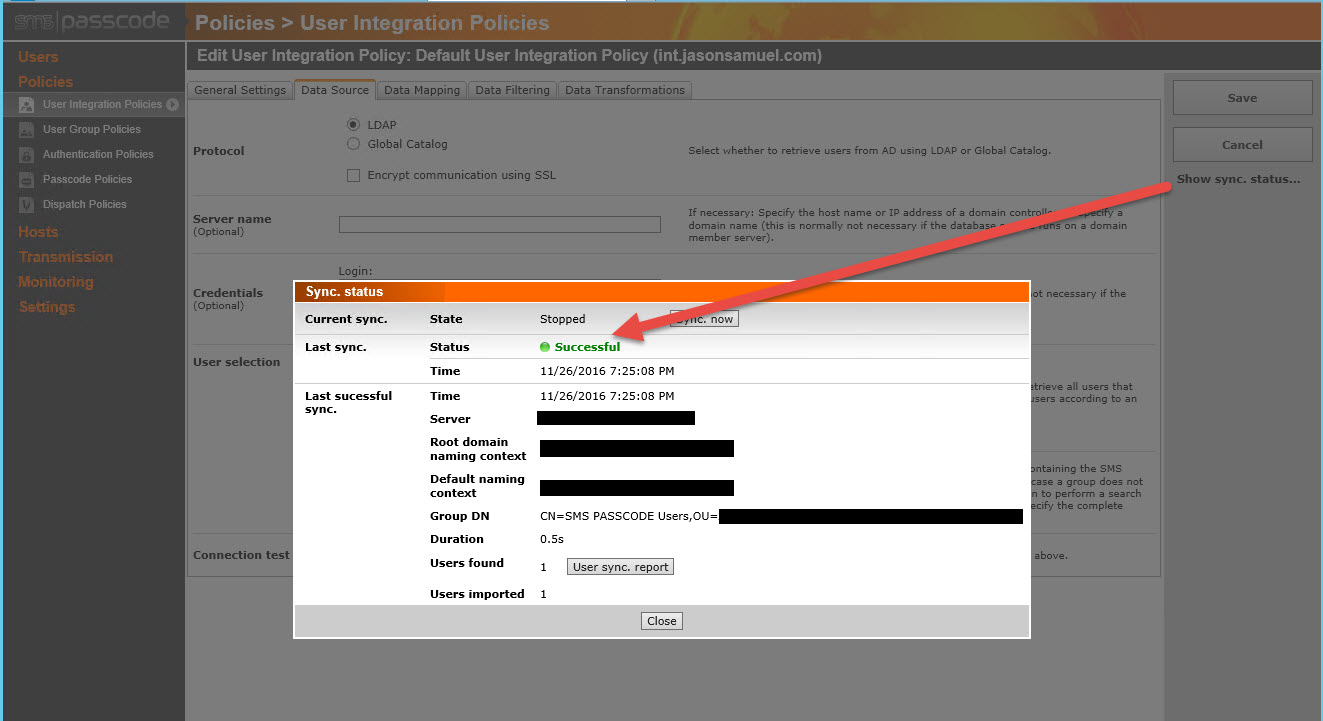
If you just created your security group it might take a minute or two but the Sync status will go green. If you want more info on exactly what is happening click Show sync status on the right side, don’t use the Connection test/Verify settings option at the bottom as it’s not talking abut the sync status.
You can go to Users > Maintain Users and you should see your user IDs synched there with their phone numbers:

Configuring the Dispatch Connector for CensorNet App and mobile devices
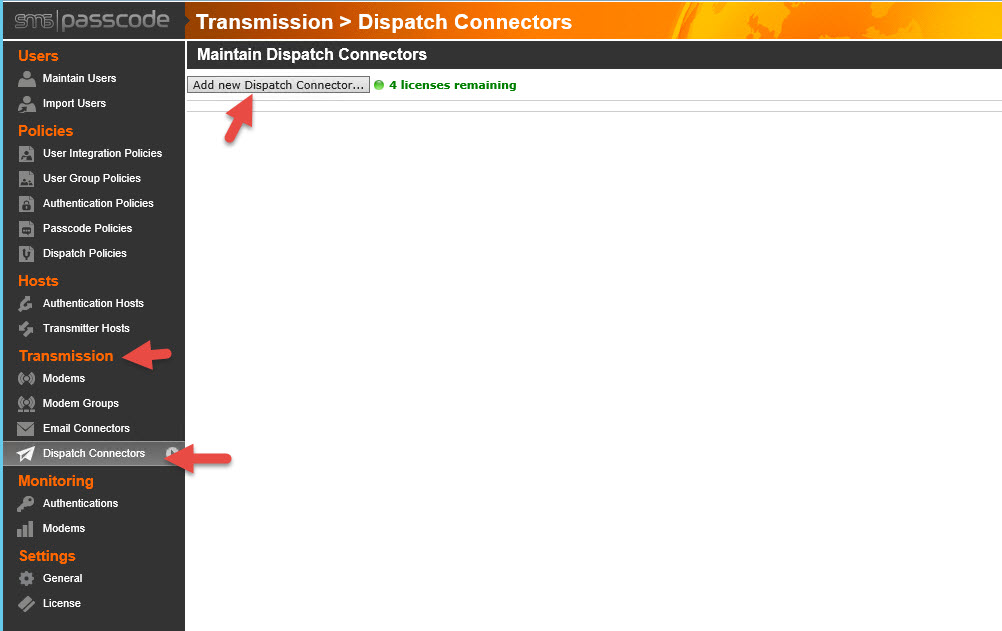
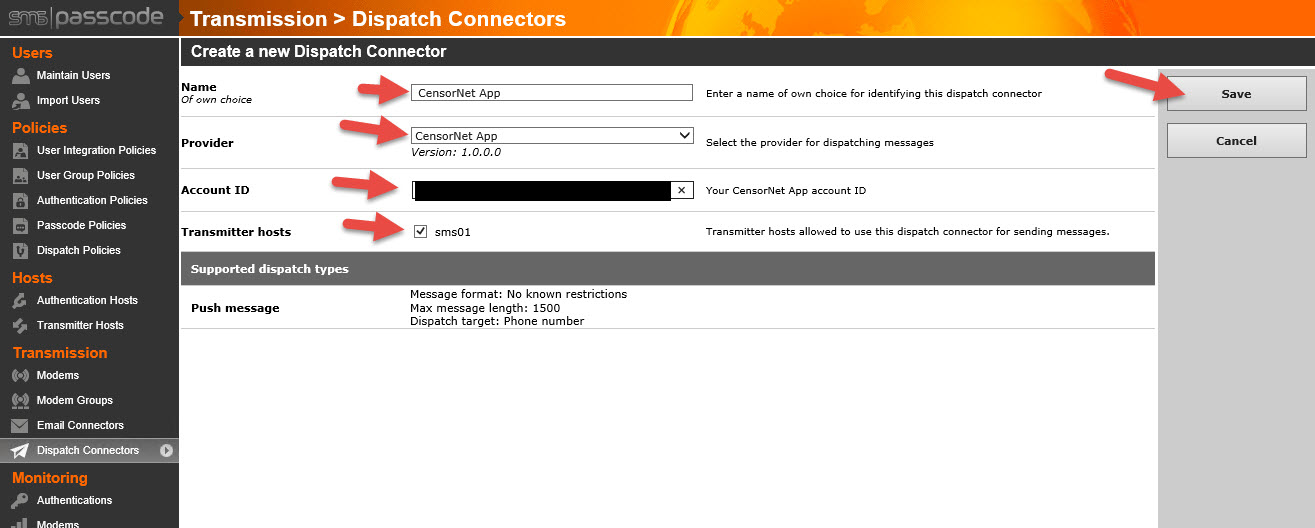
30. Now you might be wanting to hit that Test button next to your user but as is, nothing is going to work. This is because you haven’t created a Dispatch Connector yet. The Dispatch Connector is what actually sends the SMS (text message) out to the user’s phone. This can be done with an on-premises GSM or CDMA modem or via a web service that can send SMS messages for you. In this example I will use CensorNet App which is CensorNet’s web service that talks to their mobile app and sends a push notification rather than an SMS. Go to Transmission > Dispatch Connectors > Add new Dispatch Connector
31. In the Provider box, you can see SMS PASSCODE is compatible with a lot of different SMS services. Again, I’m using CensorNet App in this example so I will select it and the fields will automatically change to what I need to enter for that service in order for it to work. Give it a name, paste the Account ID for the service (this is like a license code that is unique to you), and select the server as a Transmitter host. Don’t forget to select hit Save in the top right.
32. Before I can test, I need to go my phone’s app store and install the CensorNet mobile app which was released very recently. This allows encrypted OTPs (one time passcodes) to be pushed to me via my mobile device. It also allows for other notifications like welcome notifications, reminder notifications, MFA lockout notifications, AD lockout notifications, and password expiration notifications:

Apple iOS devices:
https://itunes.apple.com/us/app/censornet-app/id1079335272?mt=8
Android devices:
https://play.google.com/store/apps/details?id=com.smspasscode.authenticationcloudauthenticator&hl=en
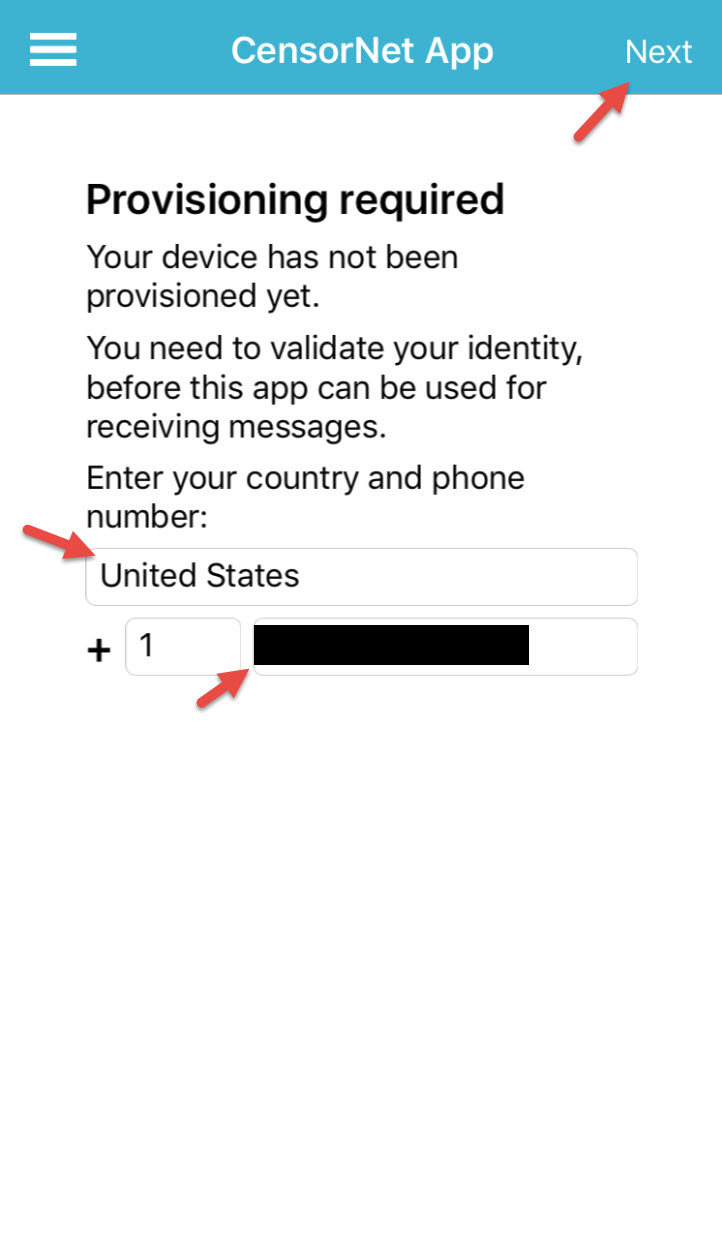
33. Once I have the mobile app installed I need to provision my device. Basically prove I am who I say I am and that this is my device. In this first screen select your country and it will automatically add the prefix. Just type in your cell phone number after that and hit Next in the top right.
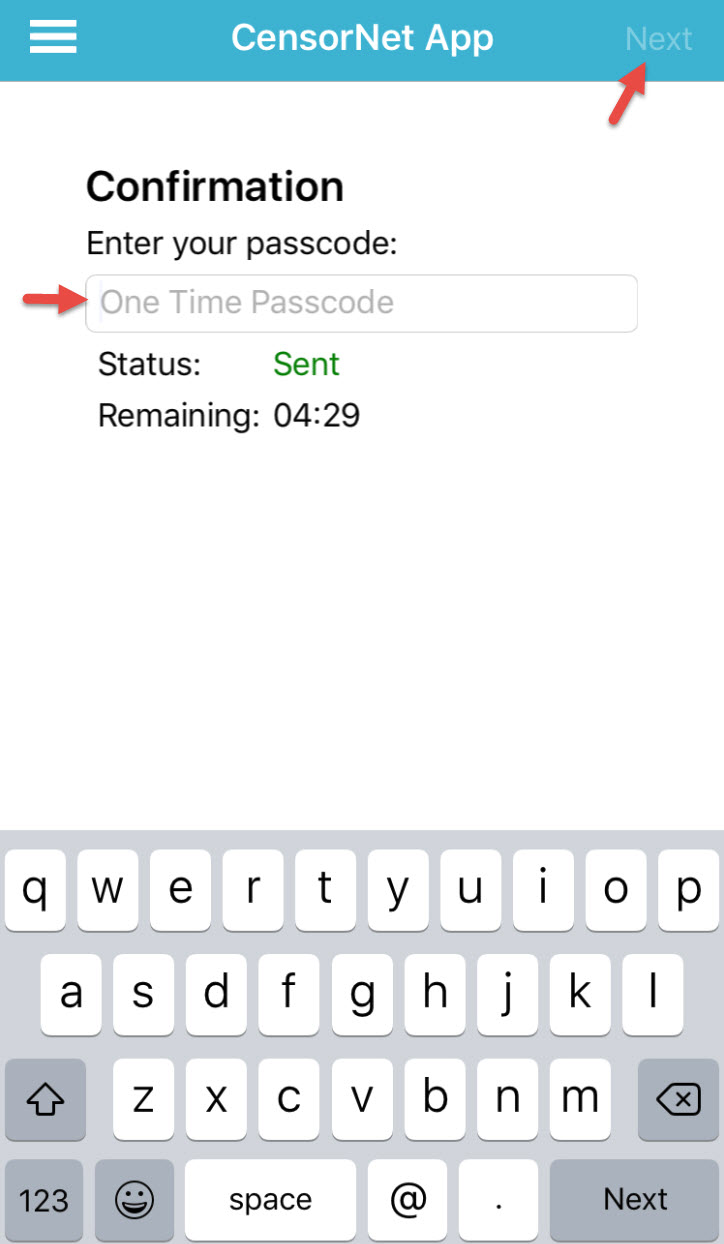
34. You will get a text message with a One Time Passcode (OTP) and will have a 5 minute countdown to enter it before it expires. Type in the code and hit Next.
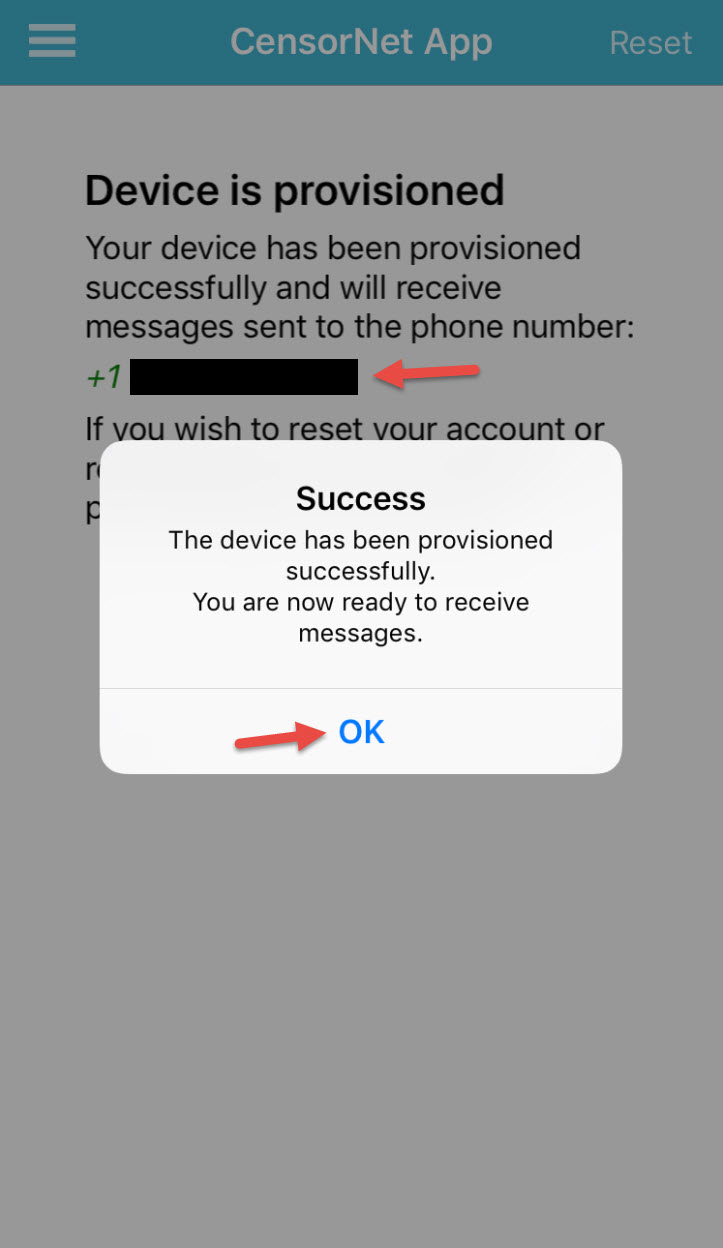
35. You will then get a message saying the device has been successfully provisioned.
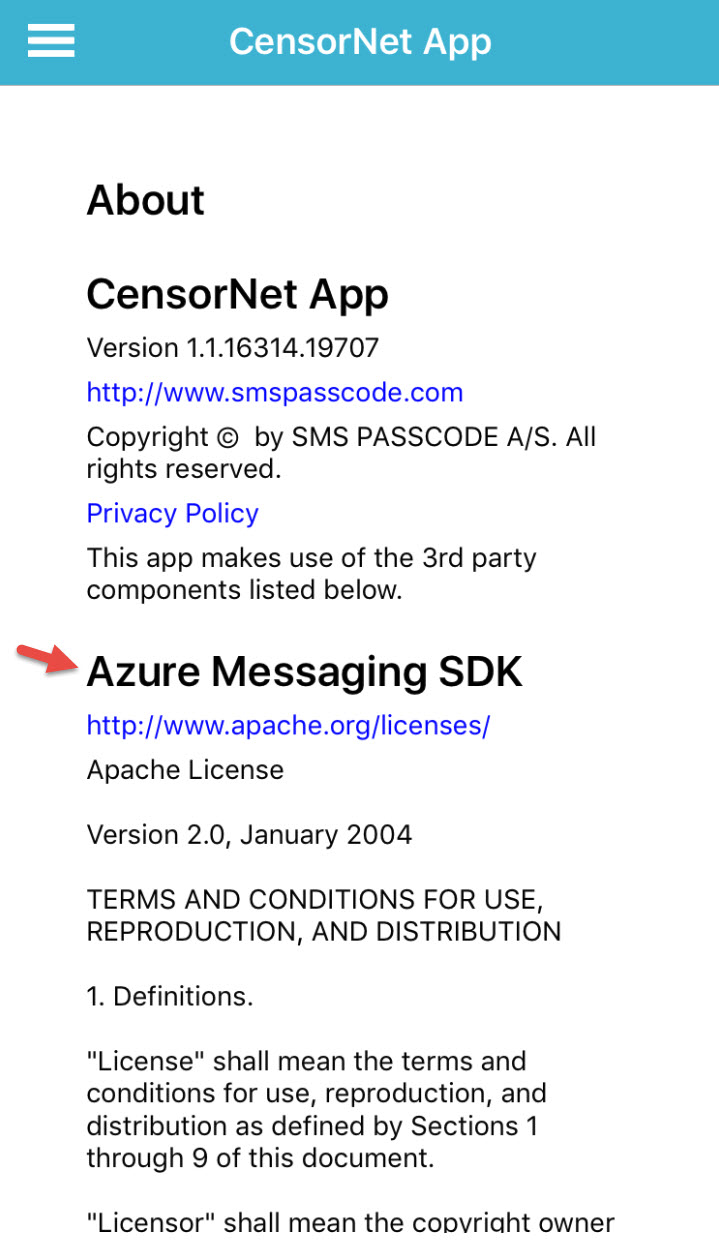
36. Extra bonus, go to the About section of the CensorNet App. They’re using the Azure Messaging SDK (Xamarin)! Very cool!
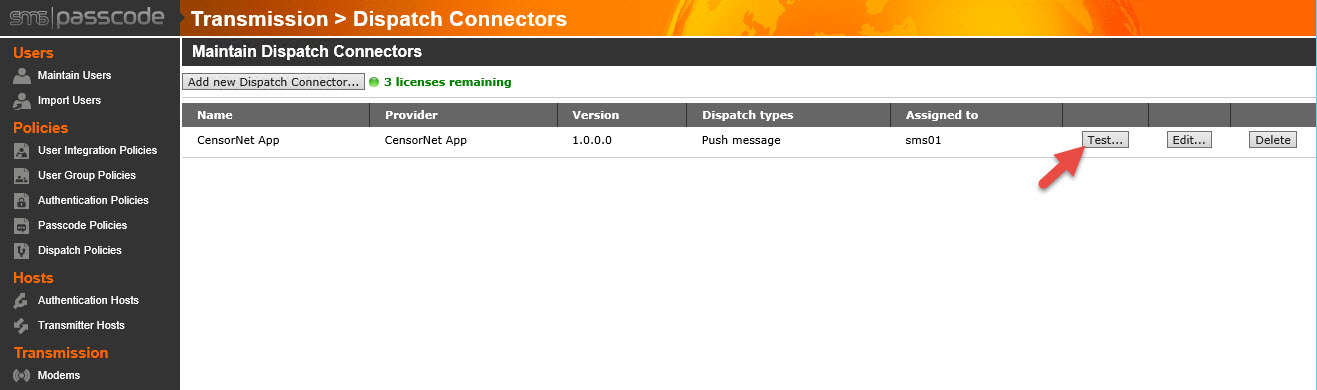
37. Now you can actually test the CensorNet App SMS service by clicking the test button next to a user or by the dispatcher you created earlier.
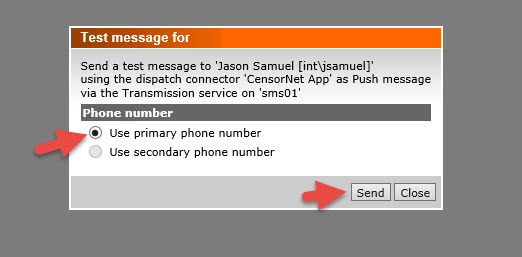
38. You can hit the Search button and find one of your users to test against.

39. Select the primary number and hit Send.
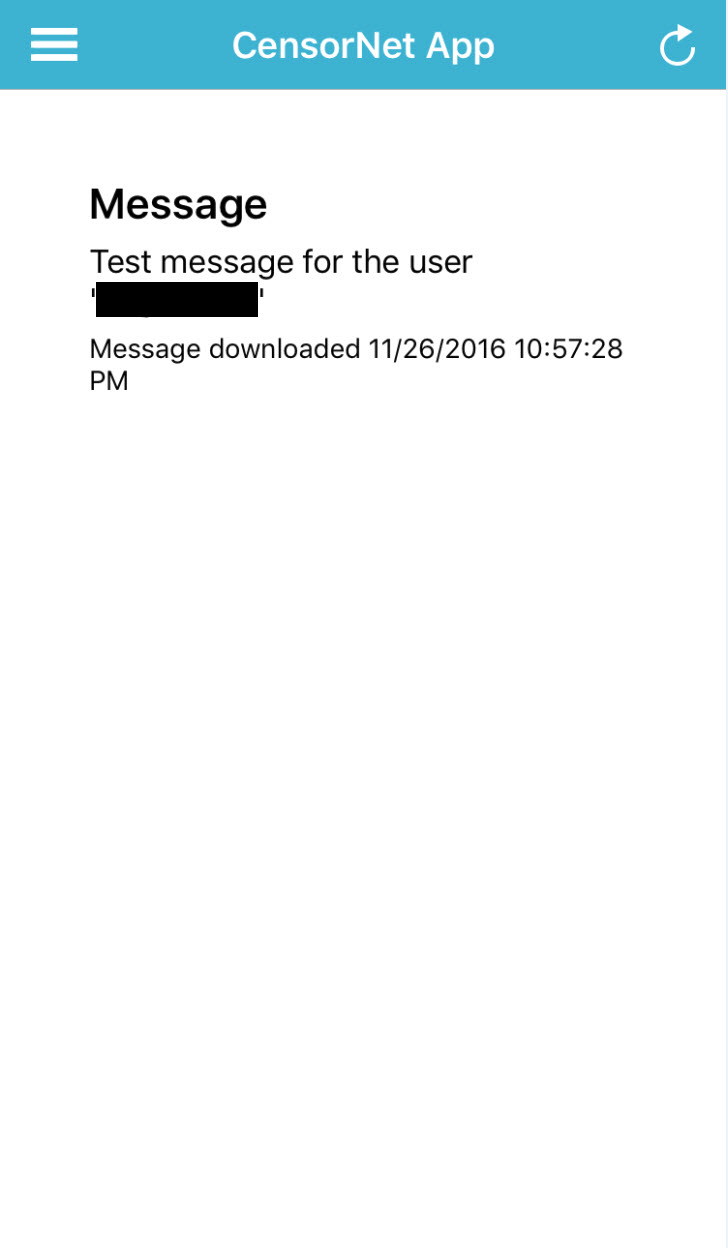
40. You should get a push notification on your phone and a message similar to this.
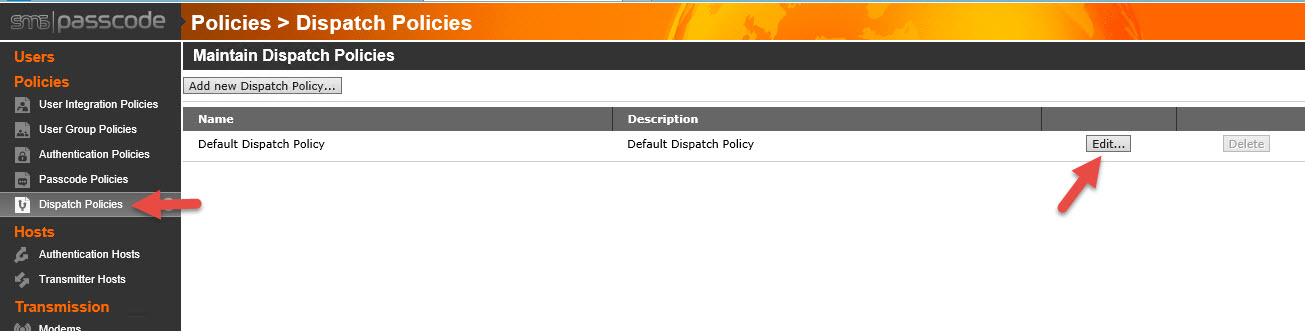
41. The Default Dispatch Policy is set to attempt to dispatch an SMS via a modem. Since I’m using a push message with a Dispatch Connector, I need to specify this on a new dispatch policy rule. Go to Dispatch Policies and click Edit.
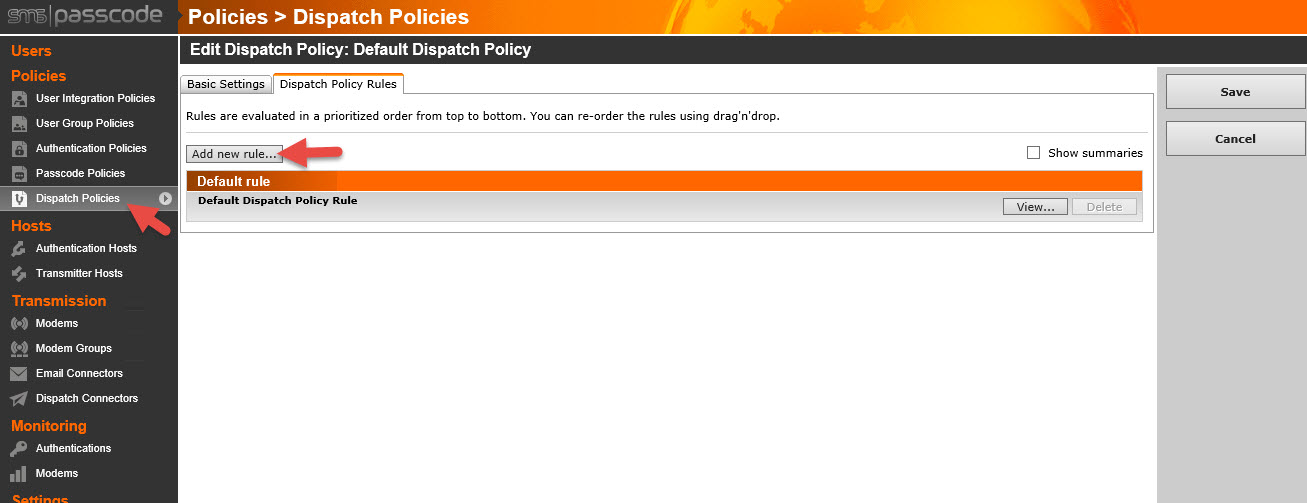
42. Now click the Dispatch Policy Rules tab and hit Add new rule.
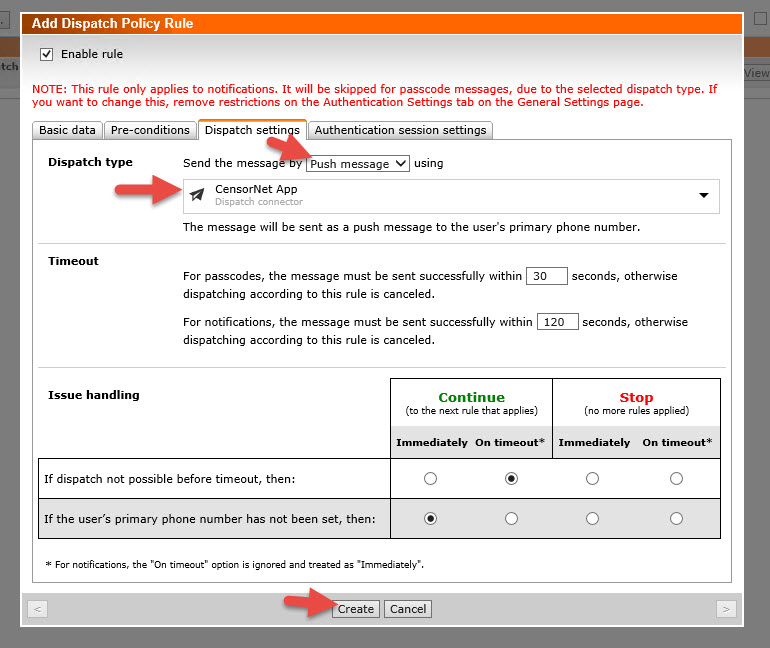
43. Give it a description like “CensorNet App” and then go to the Dispatch settings tab and switch Dispatch type to Push message. It should automatically default to the CensorNet App dispatch connector if that is the only one you have setup so far. Take note of the message along the top saying we have not enabled passcode messages. We’ll take care of that in the next step. Just hit Create. Don’t forget to Save your Rule order on the next screen or it won’t take.
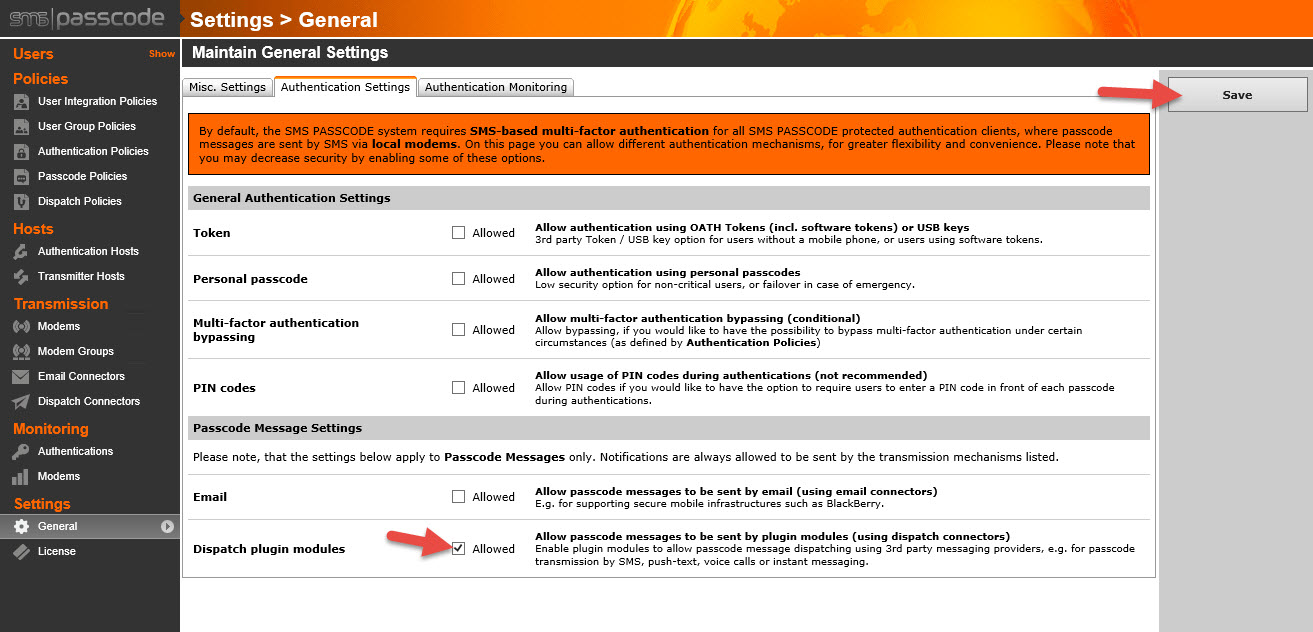
44. Go to General > Authentication Settings and check the Dispatch plugin modules check box. This is what allows passcodes to be sent via the CensorNet App dispatch connector. Don’t forget to hit Save in the right.
Configuring the Network Policy Server
45. Open up the Windows Network Policy Server (NPS) console
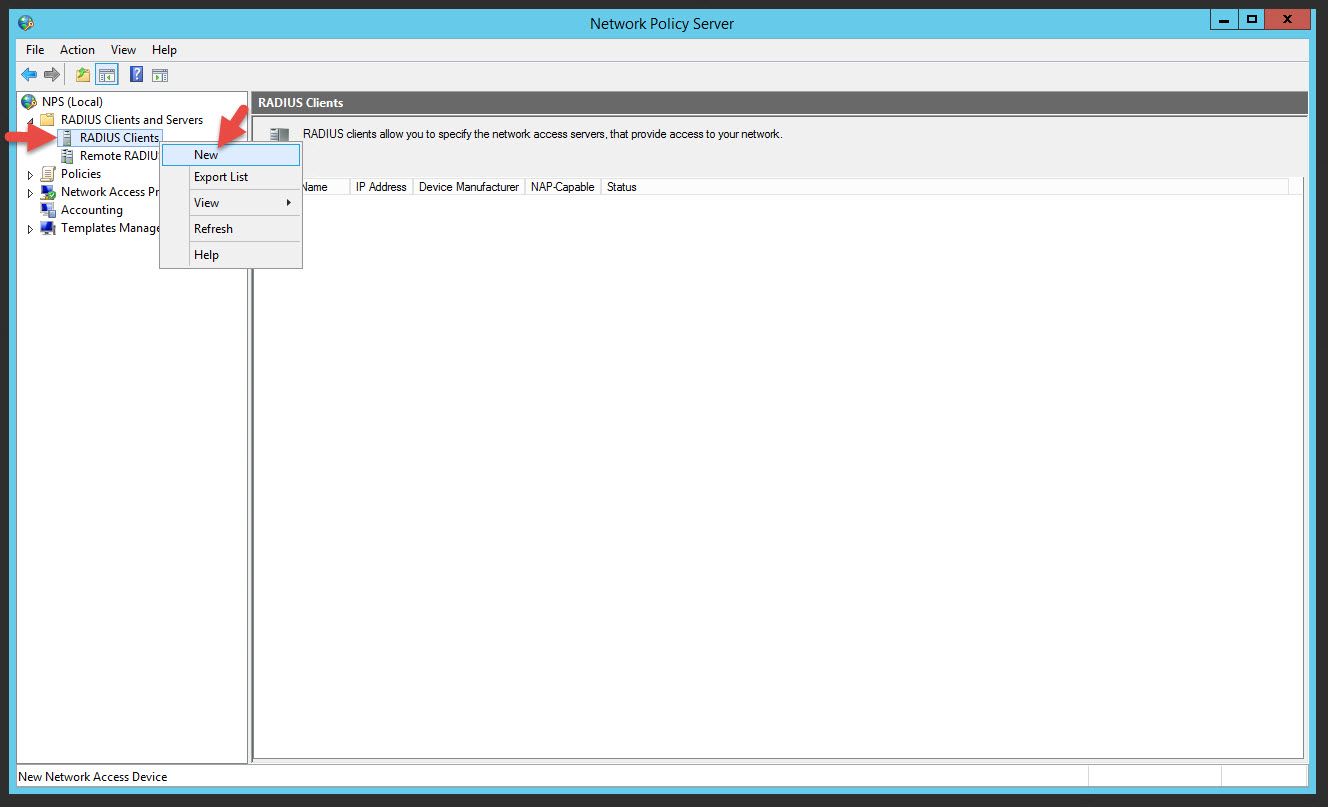
46. Expand RADIUS Clients and Servers > RADIUS Clients and right click on it to create a New RADIUS client.
47. Give it a friendly name like “NetScaler Gateway”. For the IP you would normally need to put in the NSIP of the NetScaler which is where authentication traffic flows through. If you load balance the NPS server or servers through the NetScaler itself however, the authentication traffic will flow through the SNIP. In this example I am going to put in my SNIP because I will later load balance this single NPS server through the NetScaler. You can create a Manual shared secret here. If you hit Generate it’s going to be too long and have special characters the NetScaler may not be able to process. Keep in mind this is not the same secret password you created for the SMS Passcode servers to communicate with each other. This RADIUS shared secret should be something completely different. Make sure to copy it out, you will need it later when configuring your NetScaler authentication policy.

48. Now it should take you back to the RADIUS Clients console and you should see the status is set to Enabled:

Using the NetScaler to load balance RADIUS requests
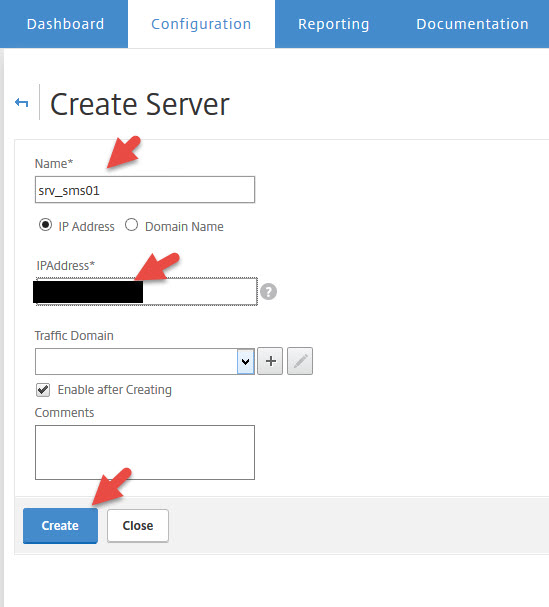
49. Now log into your NetScaler and add the SMS PASSCODE server running the NPS Server as a new server
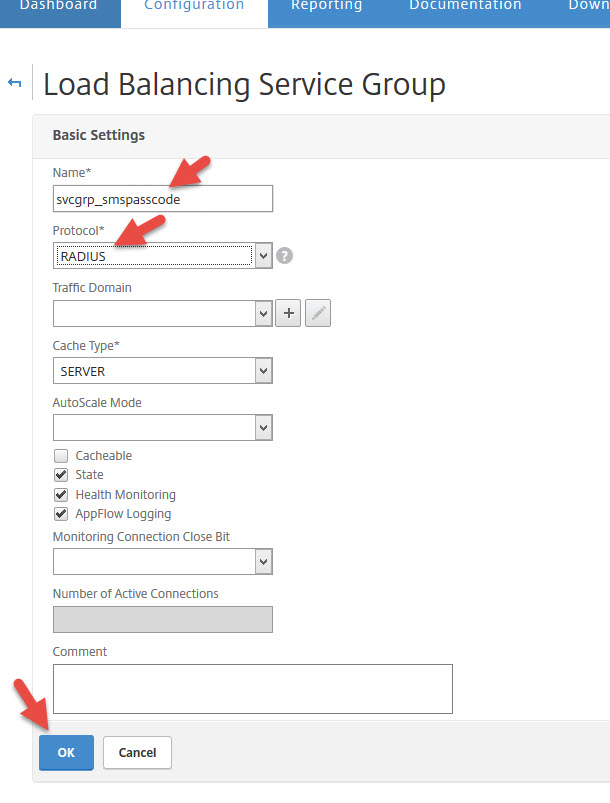
50. Now create a service group with the RADIUS protocol
51. Click on No Service Group Members to add a member server
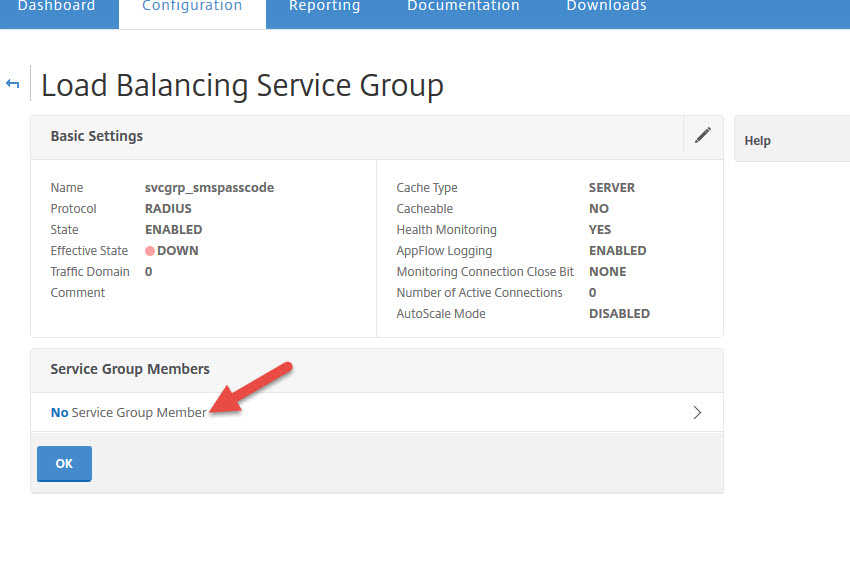
52. Now add the SMS PASSCODE server you created earlier and set the port to 1812 for RADIUS communication

53. Hit OK

54. Hit Done
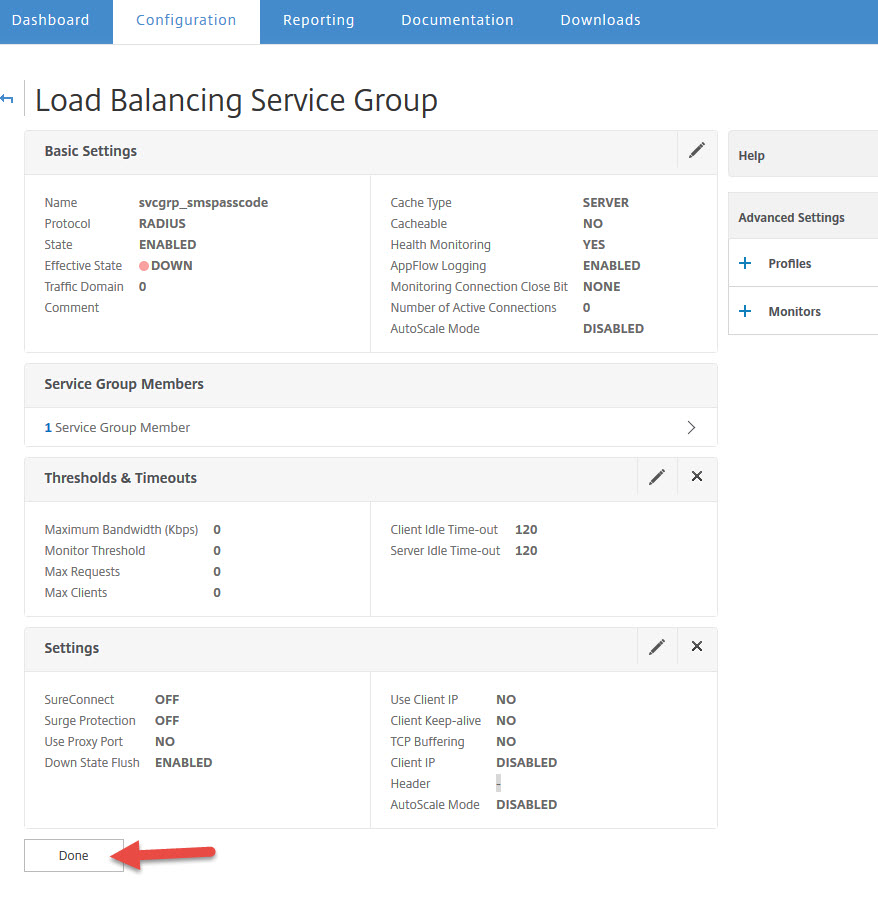
55. You may have to hit refresh once or twice but it will eventually go green and show UP

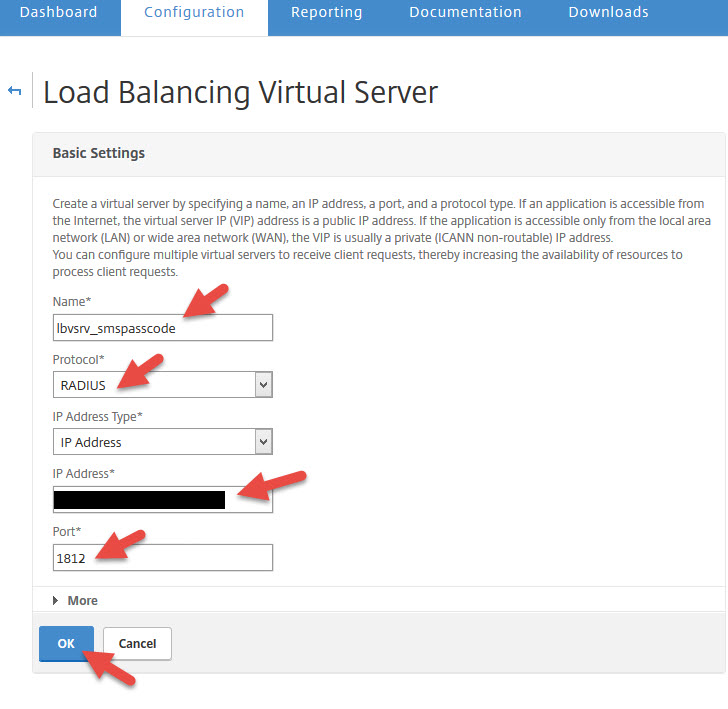
56. Now time to create your load balanced virtual server. Set the protocol to RADIUS and set the IP to 1812.
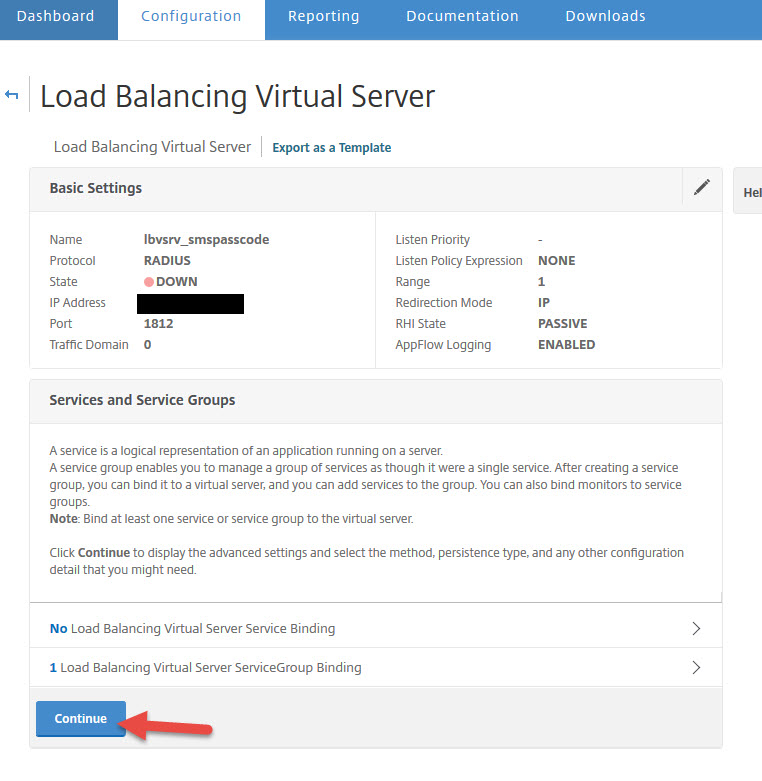
57. Now add a Service Group binding

58. Bind the service group you created earlier

59. Now click Continue
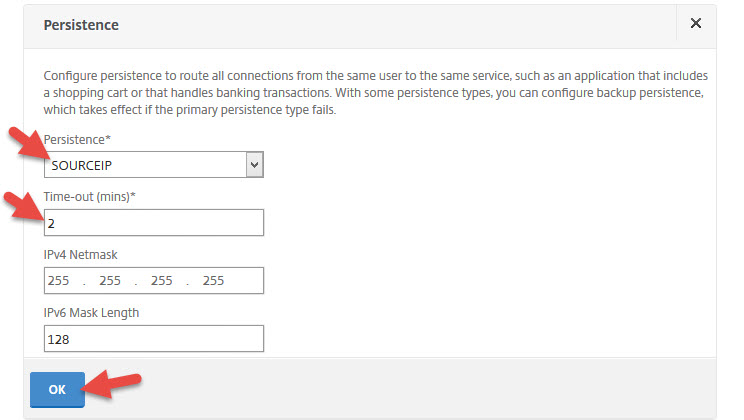
60. Now add Persistence
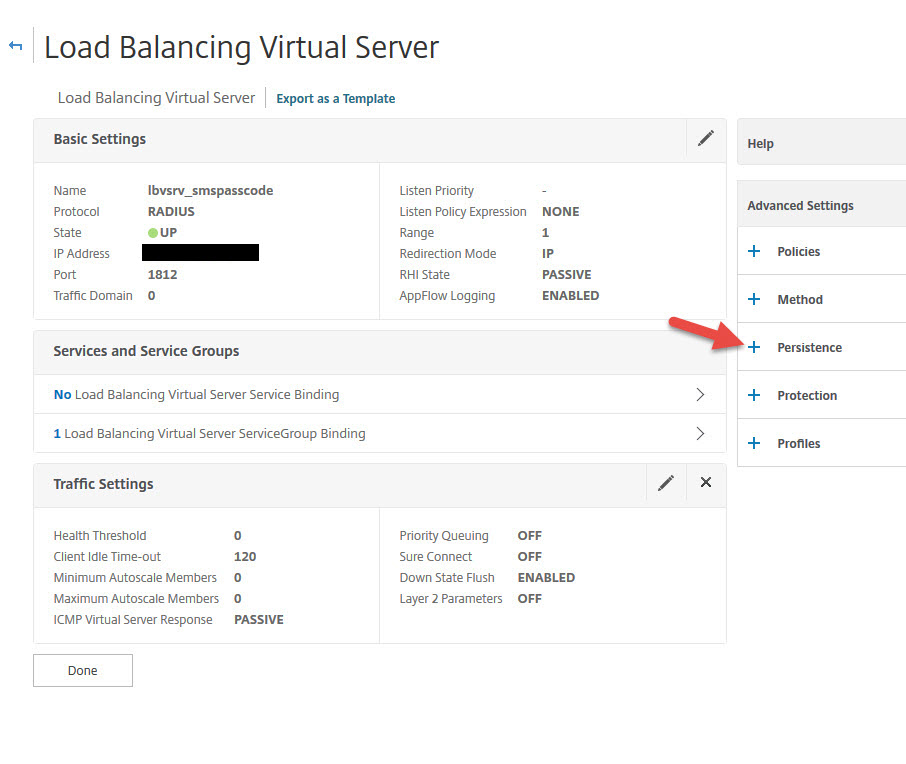
61. You can leave it as Source IP with a default 2 minute timeout.
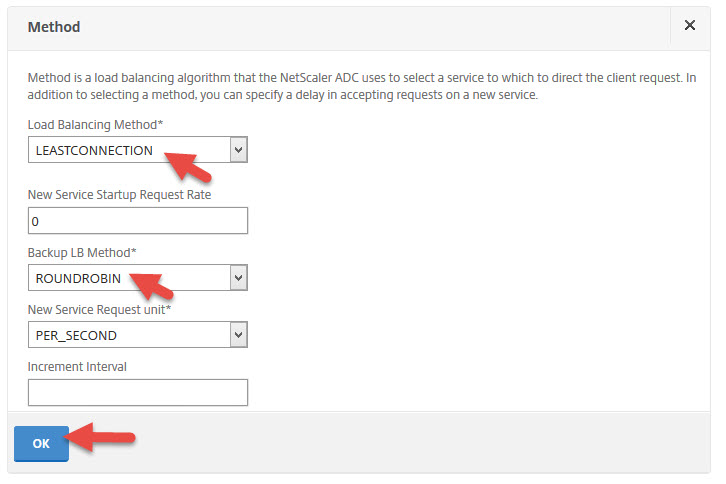
62. Now add a load balancing method
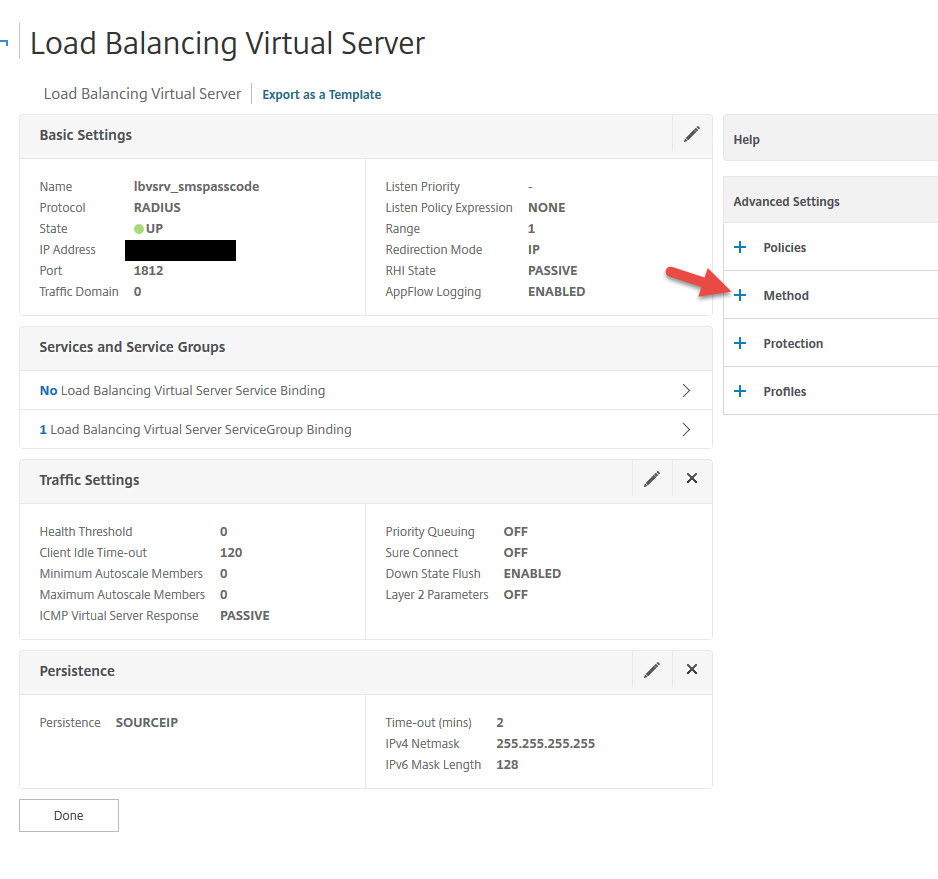
63. You can leave the default Least Connection method with Round Robin as a backup method
64. Now hit Done
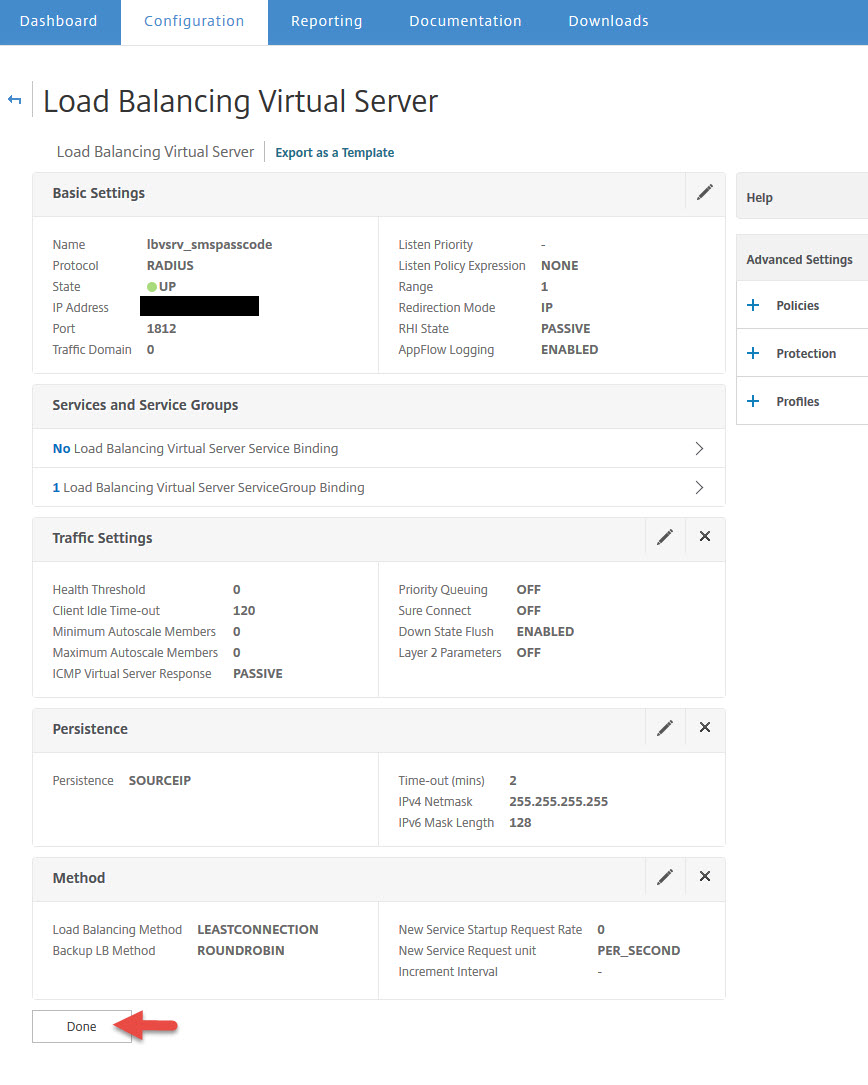
65. Now you should that the load balanced vserver is green (UP)

Configuring your NetScaler RADIUS Authentication Policy
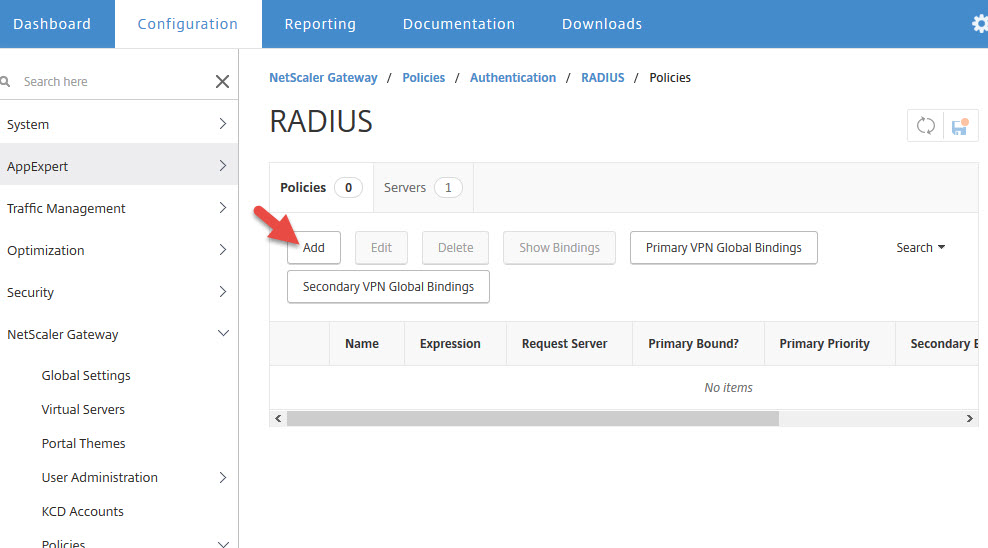
66. Now go to NetScaler Gateway > Policies > Authentication > RADIUS > click the Servers tab > Add

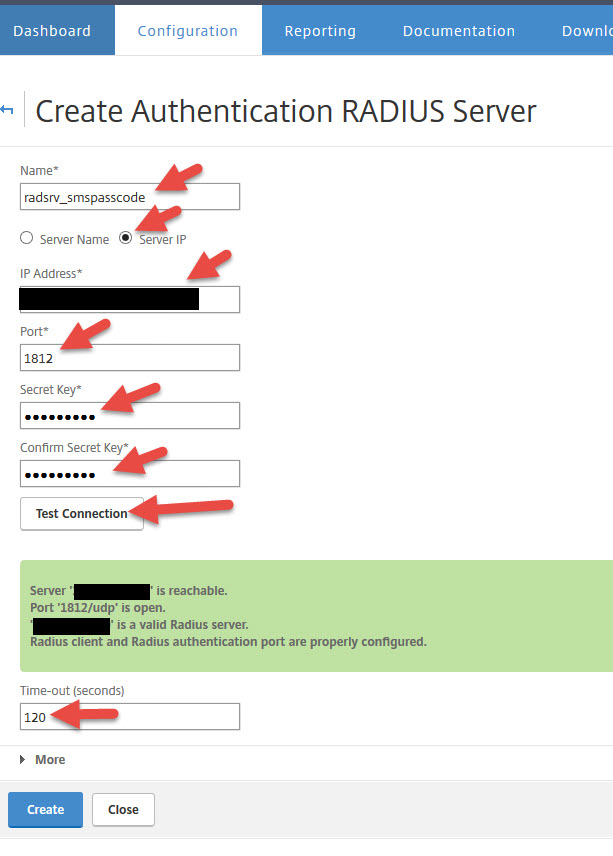
67. Give it a name and give it the IP address of the load balanced vserver you created earlier. Set the port to 1812 and add the secret key you added on your NPS server console earlier. Then hit Test Connection. It should light up green if everything is good. If something is wrong it will go red and tell you in plain English at what step it failed. The timeout value is by default 3 seconds but you’ll want to extend this depending on the type of MFA methods you allow so people have time to respond to the 2nd factor. In this example I’m just setting it to 120 seconds (2 minutes). Don’t hit Create yet.
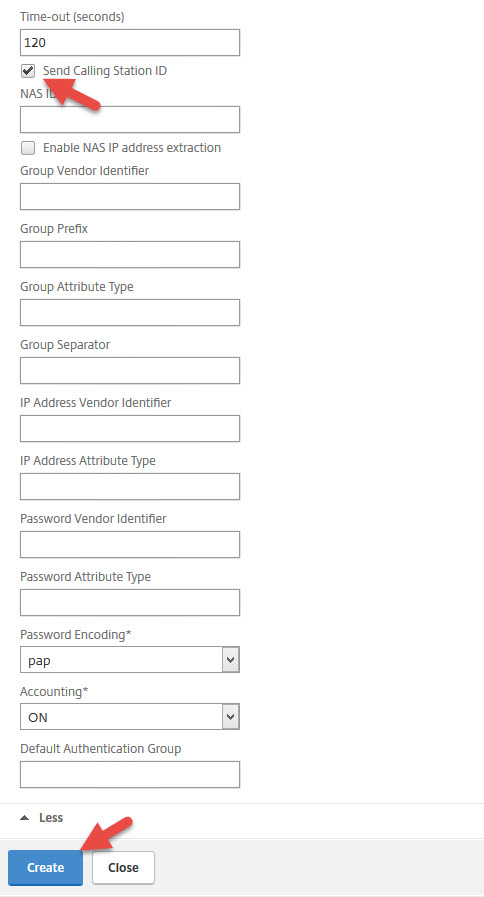
68. This is where configuring a some other kinds of RADIUS servers vs. an SMS PASSCODE backed RADIUS server differs. Hit that little button that says More and click the “Send Calling Station ID” check box. The Calling Station ID is part of RFC 2058 that defines the Remote Authentication Dial In User Service (RADIUS) protocol from way back in January 1997 (think dial-up age). It allows the RADIUS request to contain the actual IP address that the RADIUS request comes from. Now you can hit Create.
69. Now create a RADIUS policy
70. Give the policy a name and set the expression to “ns_true” so all requests will be unfiltered to the RADIUS server. Make sure the RADIUS server is the one you just created. Then hit Create.

Bind your RADIUS policy to the NetScaler Gateway vserver
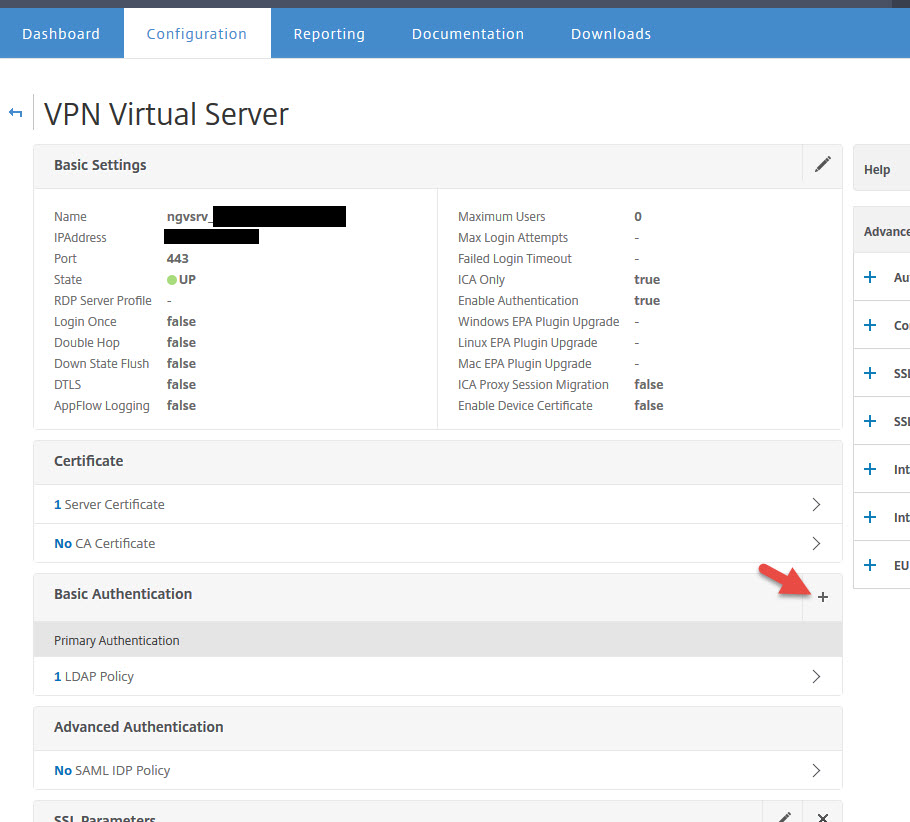
71. Now go to your NetScaler Gateway vserver. In this example I was using an LDAP policy and I now need to migrate to our new RADIUS policy. Just leave LDAP under there for now, click on the plus button next to Basic Authentication. Notice I have disabled Max Login Attempts and Failed Login Attempts for testing purposes. These are not set by default but I always recommend you set them in a production deployment.
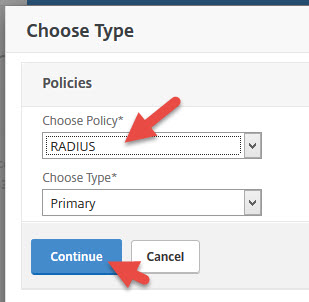
72. Choose RADIUS as the policy and hit Continue
73. Now select the RADIUS policy you created and hit Bind

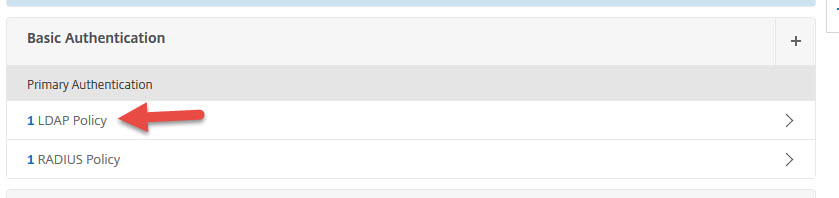
74. Now you’ll have both LDAP and RADIUS set as Primary Authentication methods. Click LDAP Policy.
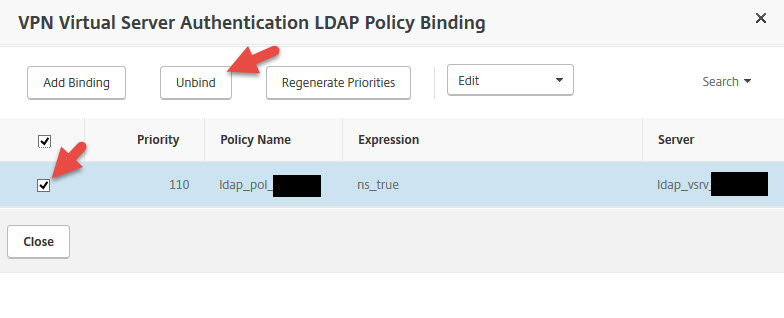
75. Now select your LDAP policy and hit Unbind
76. Now you should be down to just the RADIUS policy. Scroll down and hit Done to save your gateway vserver changes.
Testing an authentication attempt through your NetScaler Gateway
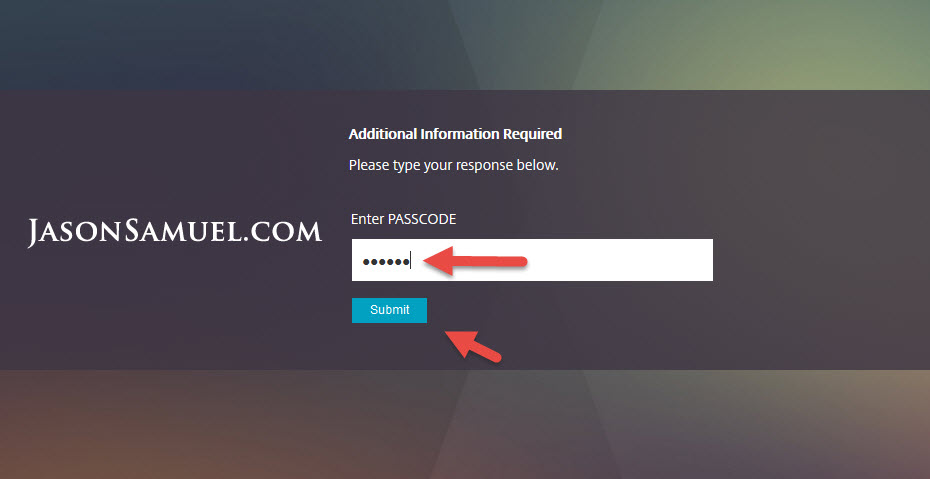
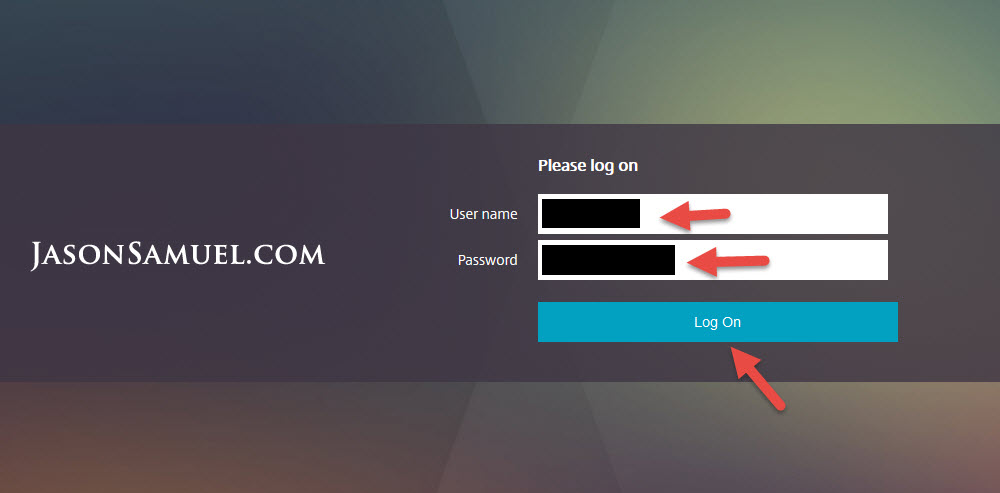
77. So now we’re finally at the point of testing it all together. Go to your NetScaler Gateway URL and enter your user ID and password like normal.
78. You will immediately be taken to a secondary page asking you to enter your PASSCODE. You should get a push notification from the CensorNet App on your phone with the code.
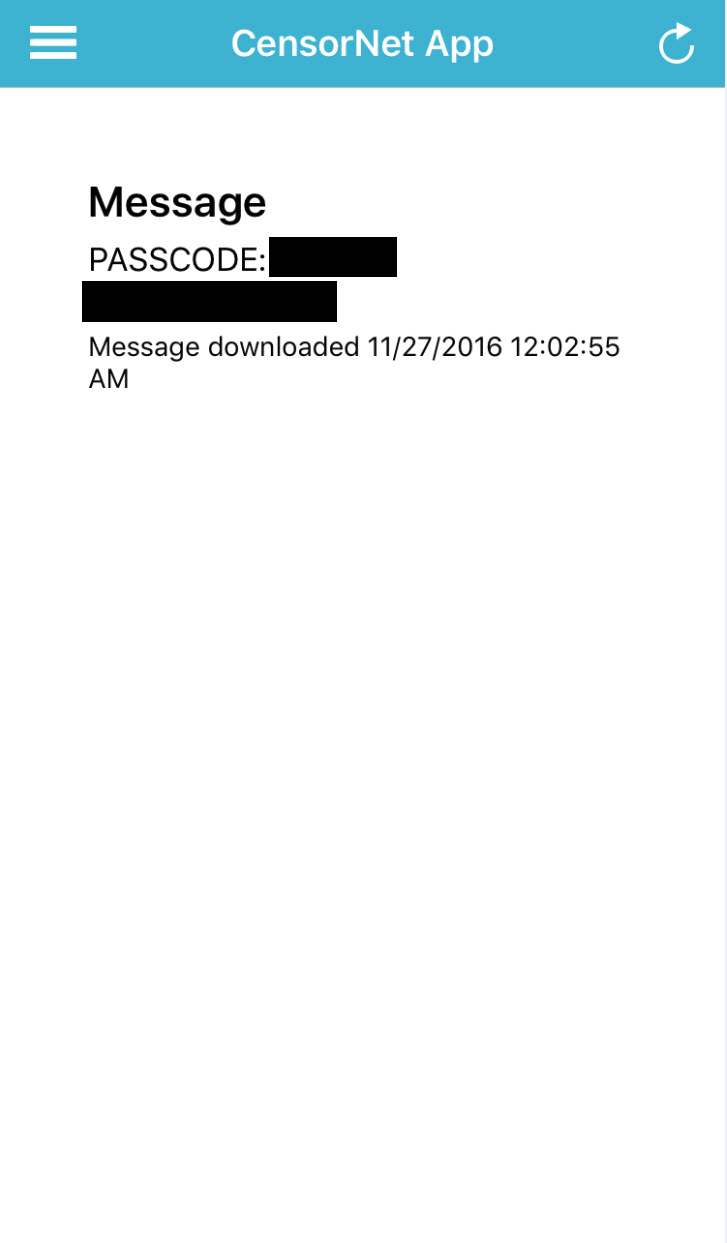
Enter the code on the page and hit Submit.
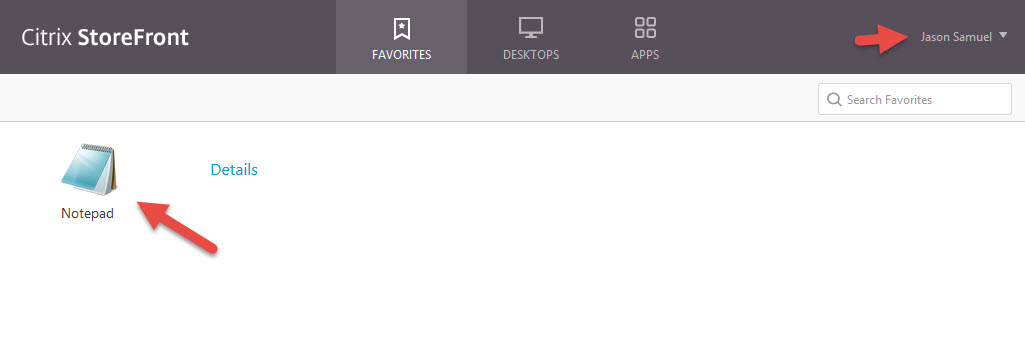
79. Now finally you will be logged into StoreFront and see your apps and desktops.
Troubleshooting SMS PASSCODE Authentication Issues
80. As always aaad.debug is the the go to answer for troubleshooting NetScaler Gateway authentication issues. If you’re new to NetScaler Gateway, just SSH into your NetScaler using Putty and enter:
|
1 2 |
shell cat /tmp/aaad.debug |
and then attempt to login to your NetScaler Gateway. You will see what’s going on with the login request in detail in your Putty window.
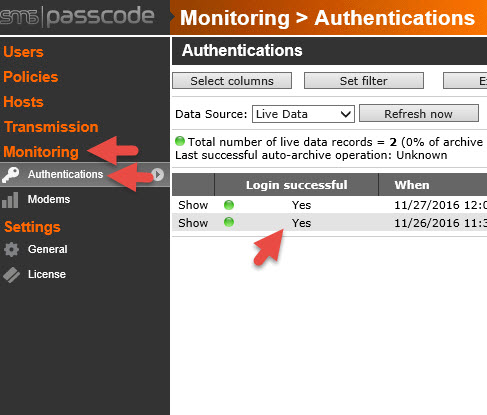
81. RADIUS logging is never very verbose like when using LDAPS or LDAP. Log into the SMS PASSCODE Web Admin gui and check under Monitoring > Authentications for the login attempt.
82. If you do not see it there that means it’s getting blocked before even hitting the Dispatcher. Go to the Event Viewer on your SMS PASSCODE server and expand out the Applications and Services Logs. There is a custom event log there called “SMS PASSCODE Authentication Backend Service”. Here you will see all the requests being sent through the NPS RADIUS server and the reason why the requests are failing. You can also see RADIUS related logs in the “SMS PASSCODE RADIUS” log which will have more detailed info on each authentication attempt.

You can also view the actual NPS logs write here if you don’t see anything in the SMS PASSCODE logs:

Advanced Policies, Self-service, and Password Reset Website
So now you’ve done a very basic SMS PASSCODE setup. From here you can get very granular with your adaptive MFA policies and setup location based authentication, trusted locations vs. untrusted locations, time of day, etc. You can be extremely granular on the conditioning you can do with your rules. You can even chain the OTP methods together in your rules so if the user doesn’t respond to one form of authentication, a secondary option is tried. If they don’t respond to the secondary and tertiary is tried. A great use case is when flying. You won’t get a text message on your phone but if you have Internet on your laptop, you can fallback to an email based authentication. If that doesn’t work you can fallback to OATH or a soft or hard token if the user is carrying one with them.
The other pieces you may have a need to deploy are the Self-service and Password Reset website roles we had skipped earlier during the install portion. The Self-service website will allow users to enter their cell phones into the system if AD doesn’t have them. They can also provide secondary cell phone numbers, changed their preferred authentication method, setup an emergency override code if they can’t authenticate using other means, etc. The Password Reset website will help keep calls to your help desk at a minimum. When the user’s AD account gets locked out, they’ll get a text or email to the password reset website. They get authenticated through MFA and then they can reset their AD user account password.
Final Thoughts
I hope this guide helps you get started with your SMS PASSCODE/CensorNet MFA deployment. If you have any questions please leave a comment below. If you would like to see more advanced policies or how to deploy the other roles like Self-service or Password Reset let me know in a comment below and I will be happy to do a follow-up post. 🙂
Jason Samuel is a visionary product leader and trusted advisor with a proven track record of shaping strategy and driving technology innovation. With extensive expertise in enterprise end-user computing, security, cloud, automation, and virtualization technologies, Jason has become a globally recognized authority in the IT industry. His career spans consulting for hundreds of Fortune 500 enterprises across diverse business sectors worldwide, delivering cutting-edge digital solutions from Citrix, Microsoft, VMware, Amazon, Google, and NVIDIA that seamlessly balance security with exceptional user experiences.
Jason’s leadership is amplified by his dedication to knowledge-sharing as an author, speaker, podcaster, and mentor within the global IT and technology community. Recognized with numerous prestigious awards, Jason’s contributions underscore his commitment to advancing technology and empowering organizations to achieve transformative results. Follow him on LinkedIn.
Disclaimer: Views expressed here are his own and do not reflect the views of his employer, past or present, or any organizations he is affiliated with. Content is for informational or personal purposes only.


James Kirby
December 7, 2016 at 8:45 PM
Extremely well written and comprehensive guide!!!
Jason Samuel
December 7, 2016 at 8:47 PM
Thanks James!
Gunnar Hermansen
December 8, 2016 at 1:21 PM
Great guide. very detailed 🙂
Jason Samuel
December 13, 2016 at 11:33 PM
Thanks Gunnar!
Charles
January 5, 2017 at 9:59 AM
Thank you for the guide. How do we deploy Password reset website along with the netscaler? Does it allow a user to change AD password at any time?
Gunnar Hermansen
January 7, 2017 at 3:06 PM
Hi Charles,
The password Reset site, will allow you to change password at any time, unless you have an AD group policy (security, passwod policy) with a password minimum age that prevents you from changing password. The Password Reset site will always enforce the AD Password policy.
Aaron
July 6, 2017 at 9:45 AM
Where is the netscaler configuration done that prompts the user for the passcode on a subsequent page? Or, is this included with the radius policy? We’re using Azure MFA on-prem and want to do something similar. We’re using LDAP at the moment.
LeChat
February 1, 2018 at 3:58 AM
Very good article ! Thank you for the share !
Chris
August 22, 2019 at 7:21 AM
Hello, i tried this article with NetScaler 12 and wright-sms. The NetScaler do not Show the second page for the passcode?
Any idea?
Thanks
Regards
Chris
Jim
March 5, 2021 at 1:03 PM
Very nice and detailed guide. Is it still possible to ask for a self service portal guide?