Citrix XenApp
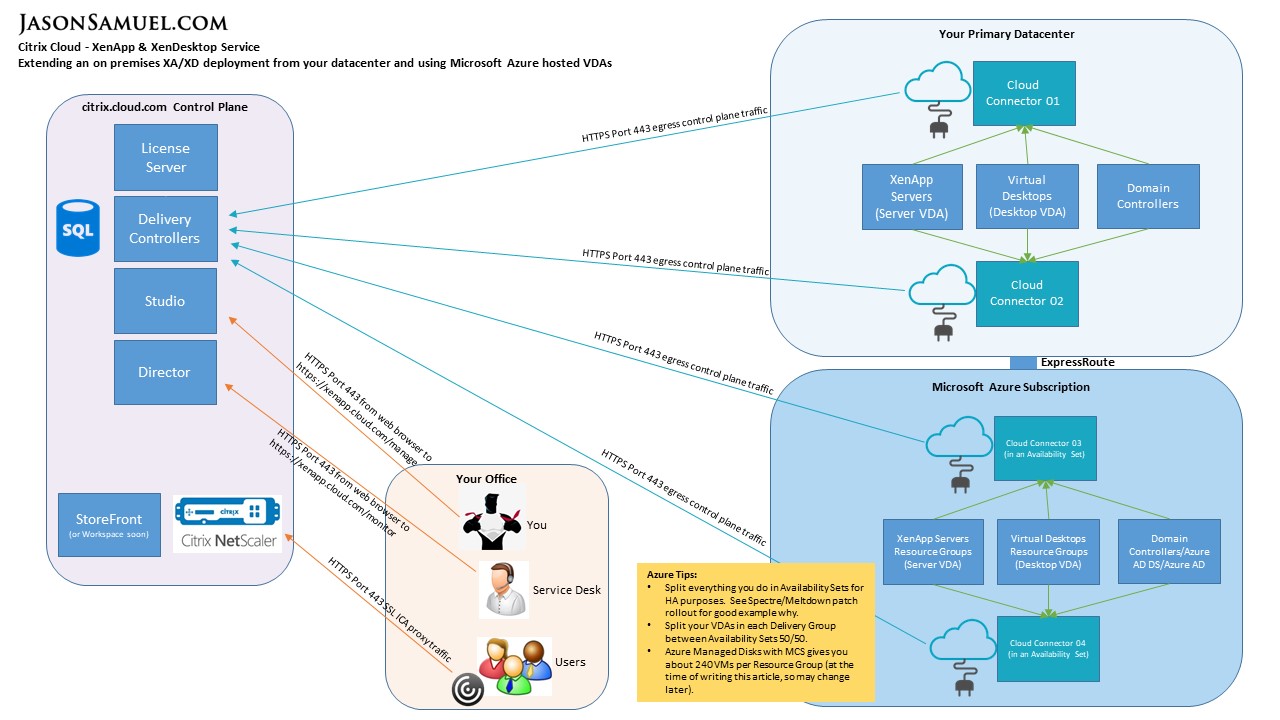
For the longest time when I was still a Citrix Admin I did not fully understand what Citrix Cloud was. Years ago when I...
Hi, what are you looking for?
For the longest time when I was still a Citrix Admin I did not fully understand what Citrix Cloud was. Years ago when I...
A few days ago we saw the release of XenApp & XenDesktop 7.11, a huge release in terms of features. As a CTP I’ve...

Are your users blown away by how fast VDI logins or are they horrified at how slow it is? If horrified then read on....
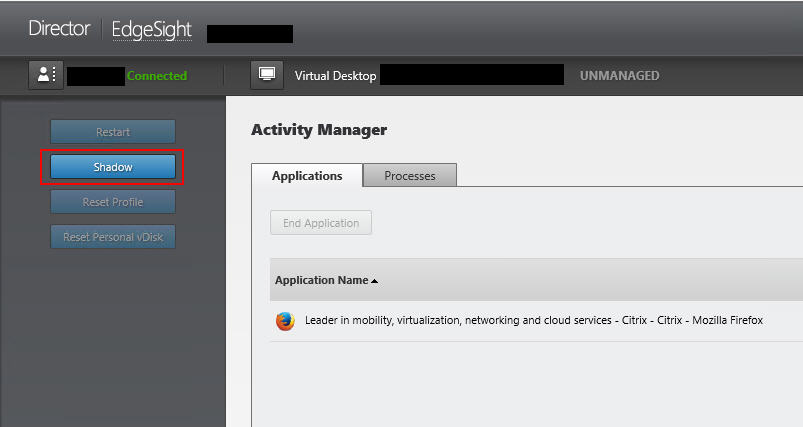
Citrix Director is considered the first console you should open when you want to see an overview of what’s going on in your Citrix...

On XenApp 7.5 servers (and possibly 7.1 and 7.0), you may notice the registration state of the machine is stuck on “Initializing” in Citrix...


