

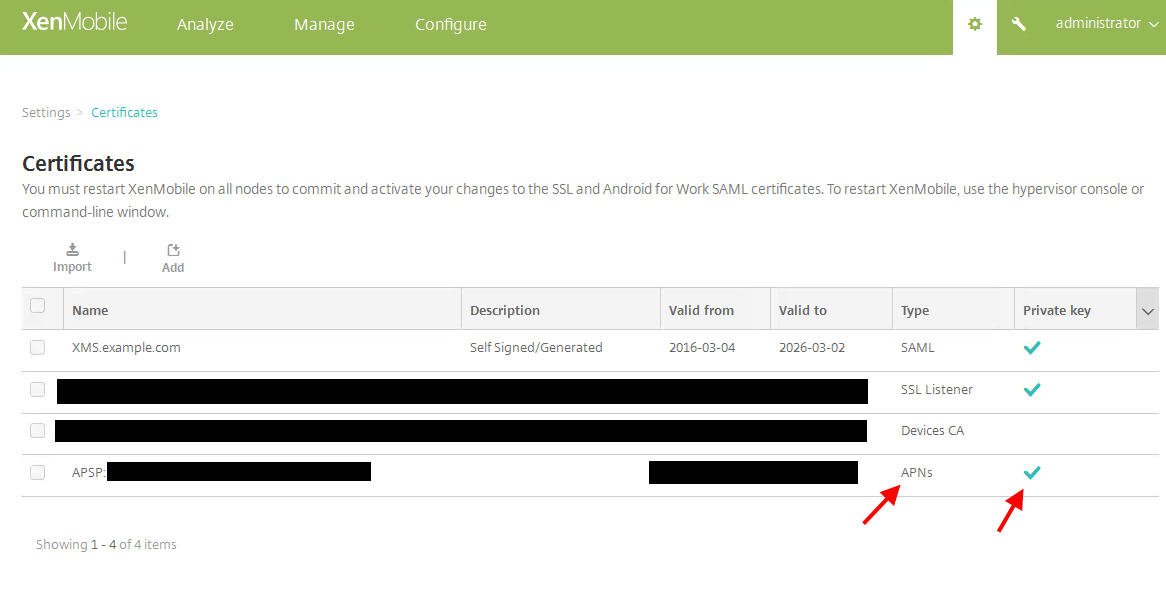
In this example I will show you how to export an SSL cert like an APNs (Apple Push Notification service) cert from one XenMobile appliance to another. And yes Apple wants you to spell it APNs instead of APNS. In this example I’m using the latest 10.3.5 version of XenMobile on both appliances. If you login and hit the Gear icon in the corner and go to Settings > Certificates, you can see the APNS cert has the private key available (the green check mark):
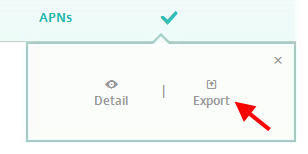
When you click on the APNS cert you will see a box come up giving you the option to Export. Click Export:
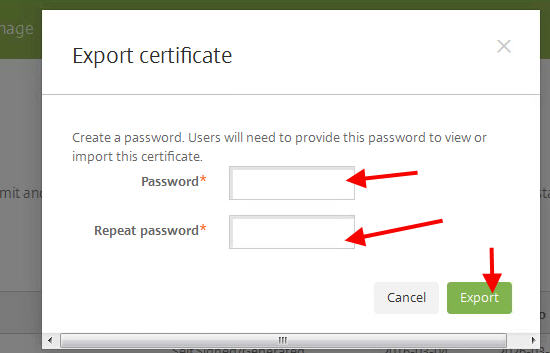
You’ll be asked to create an export password so you can decrypt and use it on the other appliance you are migrating the cert to. Type in your password twice and hit export:
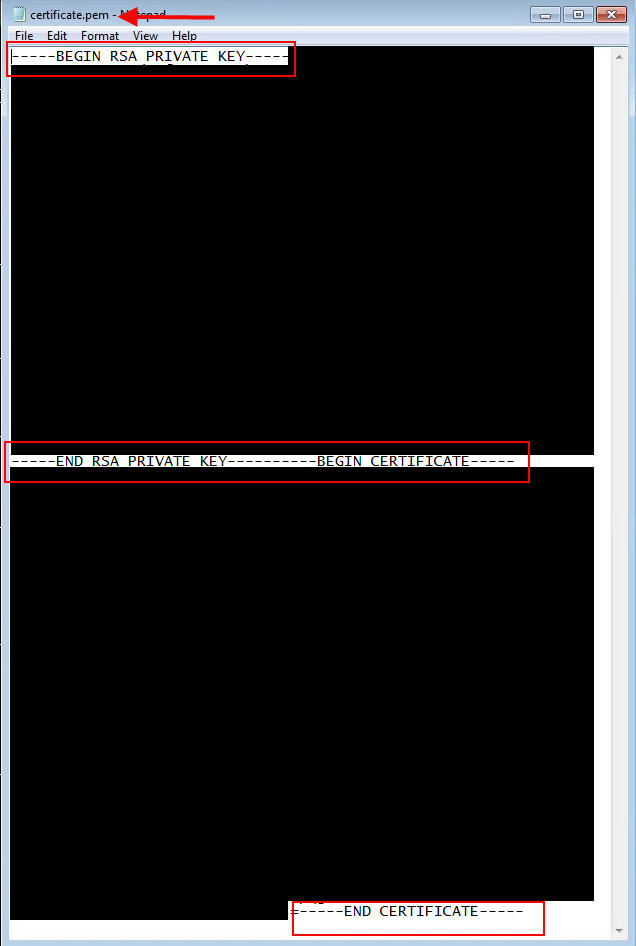
The resulting file will be called “certificate.pem” and if you open it in Notepad, you will see the RSA Private key section at the top and the cert at the bottom. This is proof that both the cert and the private key have been exported:
Now go to your other XenMobile appliance you are migrating to. Login and click the Gear > Settings > Certificates. Click Import at the top:

The Import wizard will pop up:

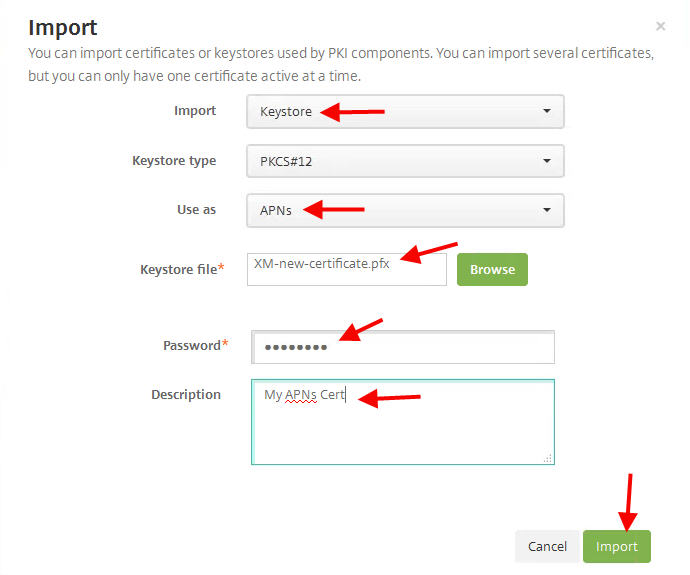
You need to set the Import to “Keystore” and Use as “APNs” since this is an APNs cert:

If you attempt to use the “certificate.pem” with the password you had created, you may get an error message saying “Error The imported file is invalid” like this:

The easy way to get around this message is to convert your .pem file into .pfx format. You will need to download OpenSSL for Windows and install it. Once you have installed it open up C:\OpenSSL-Win32\bin in Windows explorer and copy your “certificate.pem” into it. You can leave it wherever it is as well but to make this syntax simple for you in this example I have kept everything in the root of bin. Now open up cmd and type this:
openssl pkcs12 -export -in certificate.pem -inkey certificate.pem -out XM-new-certificate.pfx
You will be prompted for the password you used earlier. Then you will prompted to create a new export password and to verify. You can use the same password if you wish. This will create a new “XM-new-certificate.pfx” file in the bin folder.

Now go to your XenMobile appliance and browse to the “XM-new-certificate.pfx” file and put in all the same settings as before as well as the password you just created:
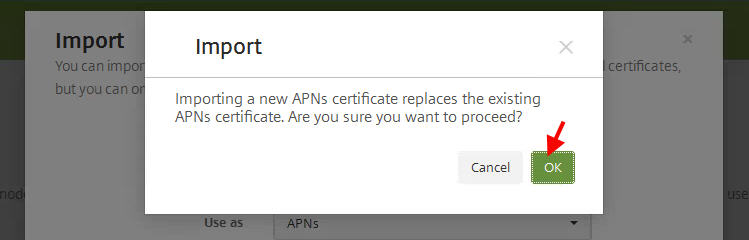
Now your cert will install just fine. In my case I had already ran through this example once before making the screenshot so it’s asking me if I want to overwrite. I say OK:
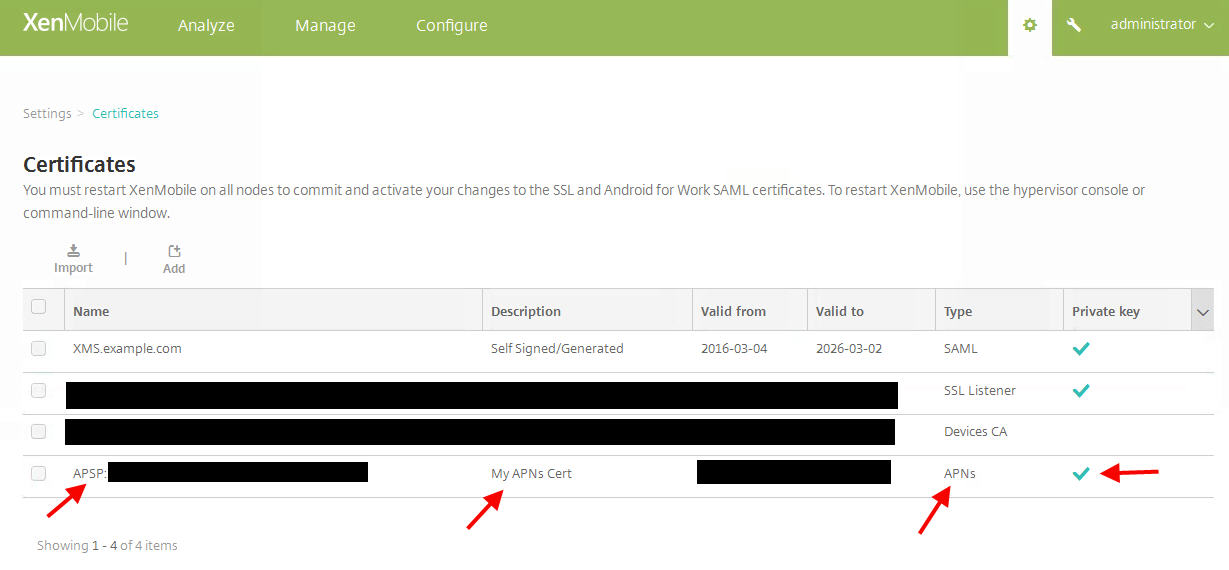
and now the cert appears in the console installed and the private key is there as well:
Hope this helps. Please feel free to leave a question or comment below.


